
 |
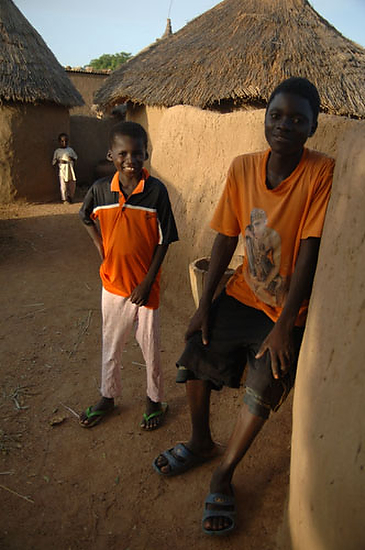
| photo by Dennis Fahringer |
If a picture is indeed worth a thousand words then a slide show is an entire book.
We’ve all endured dull evenings sitting in the dark looking at someone’s mind-numbing pictures of something they thought we would enjoy.
A slide show audience is usually a captive one; there is no escape. We owe it to those watching to present an interesting, educating even entertaining presentation.
Planning prior to the trip will change a deadly dose of the dulls into a motivating experience for the viewers.
We want know exactly what we will encounter when we arrive at the shoot, but there are some time-honored questions we’ll need to answer in order to tell the NGO’s story.
Listed below are a few guidelines that can help make a visual presentation people will appreciate and with a message they will understand.
Remember the purpose of the presentation: The presentation is to help the non-government organization. In any group, likely to see he presentation, there are possibilities for support for the NGO.
What is the GOAL?
It is to motivate people to action — be it prayer, giving or by becoming involved.
What is the REAL SUBJECT?
It’s people. Not buildings, wells, machinery nor the land. It is okay to photograph these things without people, but this shouldn’t be the focus. Present the NGO in human terms.
Who is the AUDIENCE?
Is it business people, civic clubs, the NGO’s support base, faith groups, agencies that give out grants? Make a list before the trip and look for tie-ins to these groups.
What’s the BUDGET?
What are the travel and post-production expenses? List other cost such as website.
Stay Specific:
Everything can’t be told. Pick the powerful images and subjects.
Perhaps show how the NGO has impacted a person or family. This approach helps the audience connect with those the NGO helps.
- Give an Overview of the Country
- Show the town
- Show the market place (show faces, how the people dress, their jobs)
- Highlight the work of the NGO
- Show a family
- Group photograph (dinner table)
- Individuals
- Show the NEEDS
- Why do they need the services of the NGO?
- What is being provided that meets a need: water, food and shelter?
- Show how the audience can support the NGO
- How they can volunteer
- Financial
- Equipment
- A Project
- Ongoing support of a person or family
- Specific Guidelines:
- Hold a visual on the screen for no more than ten seconds.
- Two to three seconds a shot is long enough for today’s TV and Internet savvy audience.
- A two to three minute presentation is ideal for the web. When presenting to a group give short presentations mixing these with a personal story or two. Allow time for questions.
- Write for the ear. Use short sentences.
- Record an interview and use sections of it in the presentation. People telling their story adds authenticity.
- DON'T
- Use too many pictures
- Show photos with exposure problems, with heads cut off or that need explaining. A picture should tell it's own story.
- DO!!
- EDIT, EDIT, EDIT. Show the only the best.
- Use recorded script.
- KEEP IT SIMPLE!!!!!
- NOTES:
- Visual presentations are easy to update.
- Presentations should be tailored to fit the audience.
- Visual presentations can be used to get support for an NGO; also the NGO can use the presentation itself.
- Leave people wanting more.


