
 |
| Nikon D4, Sigma 24-105mm f/4 DG OS HSM Art Lens, 2 - Alienbees B1600, Pocketwizard TTL system, ISO 250, ƒ/5.6, 1/200 |
Location
First pick a location before you do anything else. This was the location my daughter and her friends had picked out, which was a public park.
Many years ago I did her brother's prom pictures [2008] in one of the families backyard. Just look at how much location impacts your photos.
 |
| Nikon D3S, 14-24mm, ISO 200, ƒ/9, 1/60 |
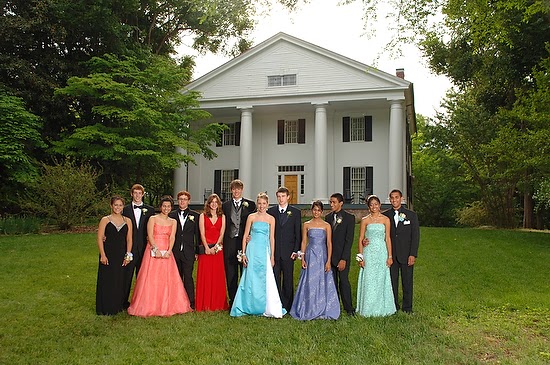
This was from her oldest brother's prom pictures in front of Bulloch Hall Plantation. [2006]
Arrive Early
I recommend getting there long before the kids are to show up. I recommend a minimum of 30 minutes, but believe me an hour goes by quickly when you are doing all your test shots.

This is me setting up my lights. After a couple test shots I moved the lights again.

My wife, who filled in as the test subject, took this of me setting up. I like to make this super simple and where I can just crank the people through. You know they always are running behind and they have dinner reservations which require you to move quickly.
Keep it simple.
USE STROBES!!!!!
I cannot emphasize it enough that the addition of off camera flash makes a HUGE difference. One major way it helps is being sure you don't have raccoon eyes due to the sun overhead. Now on this day it was overcast, which can be good without flashes. I chose to use the flash to give a good color temperature to be sure all those outfits that they spent time picking out looked their absolute best.

Here you can see me working.
I suggest taking test shots and try your best to use the lowest ISO setting where you can capture some of the available light and still use your strobes. I recommend that you are about -1 stop underexposed and use your strobes to make up the difference on the subjects to give you a great exposure.
Use a Tripod
All the photos were taken with a tripod as well. It helped me to keep the camera pretty level and also in group photos if everyone is great in a photo except for one person, then because I am taking multiple shots, on a tripod, I can then take the one person and clone them into the other photo with ease.
 |
| Nikon D4, Sigma 24-105mm f/4 DG OS HSM Art Lens, 2 - Alienbees B1600, Pocketwizard TTL system, ISO 400, ƒ/5.6, 1/200 |

Shoot Loose
This is the photo I was taking when my wife captured me shooting. I intentionally shot these a little loose for cropping later purposes.
 |
| 5x7 Crop Marks |
 |
| 8x10 Crop Marks |
Put Photos Online

Put your photos online for people to download, buy prints and whatever else they may need.

When people click to order offer them many options, because you shot the photo loose for that reason.

Make it easy for people to download as I have here:

Business Cards & Take Email Addresses
We gave out my business card to everyone and we took down their email so we could send them an email with the link to the gallery, directions on how to use the online system [with screen shots] and ability now to have made my name known to the community. In case we cannot read the email address or some other reason it no longer works they can reach out to us with my contact information.
I did this for free for my daughter and her friends. They were given a password to download the images for free. I also did make it if they want to order prints online then I would then make some money to offset some of my time, but they could get the photos totally for free, no strings attached.
There you have it. Remember these points for your Prom Pictures:
- Location
- Arrive Early
- Use Strobes
- Use Tripod
- Shoot Loose
- Put Photos Online
- Give out your information and take their information
No comments:
Post a Comment