

Cameras are not created equal. When you pick up your basic Kodak Brownie Box Camera there was nothing to adjust. You had no controls. Kodak made the ultimate simple camera and used the slogan "You push the button, we do the rest."
There were several versions of the Brownie made by Kodak through the years. The first one had no flash and later they would incorporate the flash bulb to help you take photos indoors.
 |
| Photo by Capt Kodak |
Over time people learned how to get good photos, because they often had photos that didn't come out at all or were very poor. They learned to keep the sun in the subjects face verses having them back lighted by the sun.
To overcome those limitations camera manufacturers started to give control to the photographer.
There are three controls that they put on the cameras: 1) Focus, 2) Aperture and 3) Shutter Speed.
The film manufacturers then created a variety of film that we could put into the camera. The sensitivity of the film allowed you to take photos from outside in bright sunlight to inside without a flash. You would buy Black and White film with ASA ratings of 12 to 3,200.
When color film came out you then could buy daylight and tungsten film in a variety of ASAs. Later the ASA which stood for American Standards Association to now ISO which stands for International Standards Organization.
Before explaining how we got more camera modes we need to first understand in the Manual Mode. Manual mode controls Aperture and Shutter Speed.
Aperture
The Aperture is identical to the function of the iris of our eyes. It controls how much light comes through the lens to the sensor.
If you have ever taken a magnifying glass and tried to burn a leaf you knew how to get a really bright point by putting the glass between the sun and the leaf and moving it back and forth. Moving it back and forth is exactly how the focus works on the camera.
When you get that fine point you will notice this larger circle of light. If you cut a small whole in a piece of cardboard you can hold it in between the magnifying glass and the leaf and eliminate that out circle.
If instead of burning a leaf you were doing this with a camera and taking a photo the more you eliminate that outer circle things in front of the subject and behind it that you focused on will become more in focus. This is what we call depth-of-field (DOF). The bigger the opening the less DOF you have and the background and foreground become fuzzy.
Shutter Speed
While aperture controls how much light comes through the lens the Shutter Speed controls how long the light is on the sensor.
If we shorten the time to 1/280,000 of a second we can stop a bullet. To do this Edgerton did this with flash to freeze the bullet after going through an apple. Here is a link to that photo.
The longer you keep the shutter open long enough you can blur things. In this photo from the Civil War times of a street if you look closely you will see the blur of people walking and moving. This is how many of those empty streets were photographed back then. The people were there, but just not still long enough to be recorded.
 |
| During the Civil War Times |
When you mix the controls together you have to find the right amount of light coming through the lens and staying on the sensor, which has been set to a certain sensitivity (ISO) to get a good exposure.
Camera Modes
There are basically four main camera modes on many of today's DSLR cameras.
- Aperture Priority - In this mode the photographer picks the aperture they want to work with when photographing a subject. They may want a shallow DOF or everything in focus. Sometimes the photographer wants something else in between. They use the DOF preview button to see what they will get. I wrote an earlier blog on using that here. While the photographer is in control of the aperture the camera then picks the shutter speed that will properly expose the photo for the ISO picked.
- Shutter Priority (Tv Mode on Canon) - This is where the photographer is picking the shutter speed to either freeze a subject or blur some of the photograph.
- Manual Mode - This is where the photographer is in total control and picks the shutter speed and the aperture. To be sure the photo is exposed correctly they will use the camera meter to get the best exposure for the ISO they also picked.\
- Program Mode - With today's most modern cameras the camera has sensors built into the lenses to talk to the camera. This lets the camera know which lens is on the camera and pick the best average setting for aperture and shutter speed to expose the scene correctly.
Some of the many scene modes are: scene auto selector, portrait, landscape, sports, night portrait, party/indoor, beach, snow, sunset, dusk/dawn, night landscape, close-up, food, museum, fireworks show, copy, backlighting, panorama assist, candlelight, pet portrait, blossom, autumn colors, silhouette, high key, and low key.
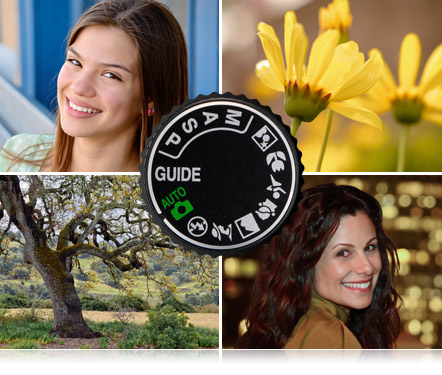
These scene modes are like cheat sheets. The photographer does not need to know how to set the camera, but just pick the scene that best matches what they are photographing.
Snow example

If you have ever photographed in snow no matter which of the four modes you choose A, S, M or P they will all be too dark. The camera sees all that snow as it being too bright. It doesn't know that it is snow.
Experience photographers will open up the exposure by 1.3 or 1.5 stops. For the person not knowing what to do, they just pick the snow setting and the camera will now open up the basic exposure by 1.3 to 1.5 stops to get a good exposure.
Portrait Example

For portraits you want a shallow Depth-of-Field. You want the background out of focus and the foreground as I have done in this photo. Not sure how to do that, just set your camera to portrait scene mode.
Sports Example

When shooting sports the photographer generally is using a very high speed to freeze the action and a fairly shallow depth-of-field to make the subject pop out from the background. Figuring this out as the player runs in and out of the sunlight takes some skill, or you can select the sports scene mode on your camera.
Silhouette Example

Maybe you like sunsets and sunrises to photograph but want the foreground to be silhouetted. In general you are going to need to underexpose the photo about 2 stops. Again, not sure what to do to get that silhouette, then put your camera on the silhouette scene mode.
You make the choice
Now to get all these different type of looks you are still having to think before you push the shutter button. What type of a photo am I making. If you do not know and just like pointing the camera and pushing the button then you need to put the camera in "Program Mode." This will get you closest to a usable photograph.
If you have been shooting in "Program Mode" for a while and are not satisfied with your results, then you need to be able to at least categorize your photo that you are trying to make by using the scene mode categories.
After shooting with these scene modes for a while you may discover you still want even more control. Maybe you want to control the DOF more and therefore you now can choose the "Aperture Mode."
Maybe you discovered you need to pick the shutter speed and you can use the "Shutter Mode" to have more control.
You may have situations you need complete control and you now can choose "Manual Mode."
Having a camera with all these modes can be overwhelming or it can help you get what you want.
Once you decide you want to have more control and understand how to use all the functionality of your camera you will finally pick up the camera manual that you never opened when you bought the camera.
The camera manual explains all the modes and even has examples. Now take that lens cap off and go and shoot some photos.
No comments:
Post a Comment