Sunday, June 27, 2010

Bag-aholic--No Longer Anonymous


How I traveled in West Africa. This is the Tramrac backpack.


I’m not the only photographer who has a closet full of camera bags.

Once you have more than one camera, one lens and one flash you need a bag. You need a backup camera and several lenses.

I carry the Nikon SB-800 that lets me fire my flash off camera. When I am not using the flash, it’s in the bag.

bagaholic

For a business situation I use the ThinkTank Uban Disguise.

If I shot the exact same type of an assignment all the time I could, perhaps, find the one perfect bag since the equipment would be the same all the time. However, I like most professional photographers, I shoot a variety of situations that call for different equipment. So I end up with small, medium and large camera bags to use on different jobs.

One of the greatest inventions is the photography vest. You can carry a couple lenses and a flash and evenly distribute the weight on your shoulders. The problem with those vests – they are too hot.

Now modular belt systems are available. ThinkTank designed one of the most popular systems. Small pouches of varying size fasten to a belt and allow you to pick which equipment to carry. This is more efficient than the vest, and it’s much cooler.

There’s another factor to consider when choosing a bag — fashion appropriateness. Wedding photojournalists do not dress the same way as news media photojournalists, but they are generally using the same equipment. From a practical standpoint it makes sense to use the belt system for the photojournalist. From a fashion standpoint the wedding photojournalist can’t wear the belt. They usually work out of a large shoulder camera bag they put in the corner of a room. Photographers need to blend in with the crowd to catch natural moments and looking like a suicide bomber with all the gear strapped to them isn’t the best way to blend in at a wedding.

bagaholics
This is the ThinkTank Modular Component System
. You can look like a suicide bomber in this one.

Some wedding photographers minimize the awkwardness of the fashion by putting just a couple items on a belt or they may just have a lens on a belt.

The good news for the camera bag manufacturers is that photographers need more types of bags than they do cameras or lenses to be able to be appropriate for any situation.

Digital photography has the double edge sword when it comes to camera bags. We no longer have to carry all that film. Just a few flash cards can be sufficient for most photo shoots. The downside - many photographers need to carry a laptop to process those images at the time of the shoot. Wire service photographers, for instance, need to transmit those images as quickly as possible. They need a camera bag with space for a laptop.

Flying with your camera gear is another issue. Many times camera gear will not fit as carry-on luggage. Turning over to the baggage handlers $20,000 of gear is scary. If they drop your bag on the tarmac, you may end of with a smashed lens or camera. They are not responsible for damaged goods, just lost ones.

You need a case that will protect your gear if it is dropped. The distance from your car to your seat on the airplane requires a case with wheels.


I have used the Domke F2 bag for the past 25 years. This is my latest one that isn't worn out yet.

One of the hidden costs in buying new gear is the impact it can have on your camera bag system. Once you have more than one bag and you add one more piece of equipment, often this will force you to upgrade a bag or two to accommodate the new purchase.

Are you a bag-aholic? Here are the stages of becoming one:

  1. Realizing that your present bag will no longer carry the equipment necessary for a job—so you buy a new bag
  2. Realizing your back is suffering and you need something that is easier on your back—so you buy a new bag
  3. Acknowledging that the funny expressions you get on photo shoots are caused by how you look carrying your gear—so you buy a new bag.
  4. Seeing another photographer’s camera bag and thinking that will work better than your system—so you buy a new bag.
  5. Final Stage – Being aware that your camera bag system is and most likely will be imperfect for all situations and therefore you find yourself in camera stores or online searching for a new bags.
bagaholic

This is the ThinkTank Urban Disguise® 60 which has room for a 17" laptop.

Once you have acknowledged you are a bag-aholic you can then move from the stage of acceptance to embracing that you must have more than one bag. Now, you to no longer able to let this be a hidden cost in doing business, but just like the need for a new lens or camera, you need to budget for new camera bags.


Monday, May 31, 2010

The catch 22 scenario of flash photography

Flashes are used in a sunroom to balance the light to the outdoors. You must be very careful in your flash placement or the glass will become a mirror and reflect the flash. Here the angle of the flash and the power match so well you almost don't notice the glass separating the indoors to outdoors.

You are at a wedding under a tent and there appears to be enough light, but why does the subject keep coming out so dark? Ah if I turn on the flash now it looks so much better. Now it gets closer to dusk, now the background is too dark and I can’t tell where we are anymore, what can I do? The problem is that when you use the flash it lights up subjects close to you and the background goes dark or even black.

THERE’S HOPE FOR YOU.

If you have one of the newer digital cameras with ISO setting of 1600, 3200 or 6400 then you are in luck. These high ISO settings let you take photos with very little light. You can get photos in many situations where flash was required before.

The issue many of us face is not the amount of light available, but the direction and quality of that light. If you are under a tent it is difficult to make a photograph where the outside isn’t in the background. This is where almost every subject has more light on the background than on their faces. If you a shooting in daytime, it is very simple to just turn on your flash and make photos. In this situation you most likely will not only get a well exposed photograph of the subject, but the background will be properly exposed.

Another situation we will find ourselves shooting in is those wonderful sunrooms. You get to experience some of the outdoors in not only cool air conditioned environment, for many of us we experience it allergy free. In this situation if you turn the flash on to compensate for your subject’s being back lighted, you may have to move a little not to get glare in the glass. The simplest way to do this is be sure you are not perpendicular to the window, but on a slight angle.

Flashes help light up under the tent to match the outside light. To do this you must match the f/stop and ISO to the outside by being sure your flash puts out the same amount. The easiest way to do this is using a TTL flash.

Once you have used a flash in these scenarios you quickly discover the joy of photography that you not only have a well exposed subject, you have a background that is well exposed and helps you capture the environment.

SUNLIGHT AND FLASH DO MIX

Even at the beach where there is sunlight practically everywhere a flash can improve your photos. Often we light to have the sun behind the subject at the beach for a very obvious reason—less squinting. But now the subject is backlit and due to this you have a similar effect of under a tent, just not as drastic of a light difference. Turn your flash on and open up those shadows.

Two flashes are used on TTL mode to fill in the shadows under their eyes as well as help with the color balance.

During the middle of the day when the sun is directly overhead you end up with people having raccoon eyes. This is where the sun casts a shadow on folks eyes, especially if they have deep set eyes and/or they are wearing a hat.

FLASH AT DAWN AND DUSK

Just the other day I was photographing at a friend’s wedding. The wedding started at 6 p.m. and as we moved into the reception the light was dropping pretty quickly until it was dark. Now if you have your camera set to automatically do it all for you and you read the manual on how to force the flash on rather than just automatic mode, then you could take the photos like I described above. The reason I didn’t tell you how to do this with your camera is every camera manufacturer has a different way to do this not only for their brand, but often their own different models do it differently—so read your manual.

photo
Fill flash on the couple and another flash is helping light up the background.

No if you just turn your flash on under the tent as the light is dropping off you most likely will get a dark or even black background. The reason for this is your camera if in an automatic mode will drop to the lowest ISO setting when your flash is turned on. Even if your camera has an ISO as high as 6400, you most likely will be shooting at an ISO of 100 or 200 the minute you turn the flash on. Why is this default? Well, the main reason is the lower the ISO the better the quality of the image. You have a greater dynamic range and the photos have less contrast and the colors are more accurate.

Up until just a couple of years ago, shooting anything above an ISO of 400 rendered pretty awful quality. Only in the last couple of years did the camera manufacturers improve the quality of the high ISO. Today the quality of many cameras shooting at an ISO of 6400 looks as good as ISO 400 of just a few years ago. Now you can shoot at ISO 6400 and get wonderful results.

photo
With the lighting taken care of by the high ISO and flash balancing the background, you can concentrate on the important things—the moments.

I would say in most situations today with these new cameras with ISO of 6400 for example, you can make great photos without flash in normally lit rooms inside.

For the wedding I was at they had candles on the table and one chandelier in the middle of the tent and the amount of light even at 6400 at 10 p.m. that night wasn’t enough to even make the photos. But when we first were under the tent at 6:30 p.m. there was enough light outside I could have had my camera set on auto everything and forced the flash on and had good exposure on the faces and background looking wonderful. This is what I was basically doing then, but as the night fell the background started to go very dark. So, what I did was change my ISO to 800 and a little later I raised it again to 1200 and by the end of the night I was up to 6400 ISO.

photo
Without a flash the couple would be silhouetted, but now they balance the background.

BONUS FEATURE

Now another bonus of shooting with a flash when your camera is set at ISO 6400, is the flash doesn’t use as much light and your batteries will last longer.

SUMMARY

Find your camera manual and read two sections—how to turn your flash on and how to change the ISO. Once you know how to override the auto everything on your camera you will not only get better photographs, you will finally get the photos this camera can do that you couldn’t do with the $8 disposable camera.

Sunday, May 16, 2010

Shoot for a variety, not just the one shot.

The other night I watched a slide show of a friend’s trip. They showed a lot of stuff they came across; a building they saw, a person they met, a famous location they stumble upon. The subjects were dead center (and I mean dead) in every snapshot. I began to wonder if their camera had sights rather than a viewfinder. My friend kept us informed (not necessarily entertained) by telling us what each photo showed.

I have another friend, Joanna Pinneo. She shoots for National Geographic. When Joanna showed photos of some of her trips each photo was a story in itself. Her photos spoke volumes. Her pictures were worth a thousand words. There was no need for a running dialogue with her presentation.


The difference wasn’t subject matter. My “dead center” friend showed us a subject, but Joanna used verbs. She presented her subjects in a variety of angles, framing, lighting and mood.

What Joanna, and other photojournalists, do that many photographers do not is they offer an assortment, a mixture of images.

Jeff Raymond is director of photography for a Christian missionary agency. Jeff and I were training his student photographers in a workshop.

Jeff said, “A lot of these students have improved their coverage of stories, but mostly what they have done is just move their subjects from dead center and made nice portraits of them.” Jeff calls these “People Need The Lord” photographs. He called them that because every missionary was copying what Steve McCurry did when he made that iconic image of a young Afghan girl wearing the red scarf for the cover of National Geographic Magazine in 1985.


The problem Jeff Raymond was addressing is that there is so much more to photograph than just a nice portrait.

To move beyond just a nice portrait some photographers use the “Day In The Life” approach. Just follow a subject for a day and capture what they do. You could tell the story as if you were doing a major paper for a school project. Take photos systematically over a period of time and use these to help tell the story.

No matter the approach you take you will need a variety of photos. A classic way to accomplish this is to begin with an overall establishing shot. Then make some medium shots that show the environment. Follow this with close-up photos like a portrait or even some extreme close-ups to show those details.


Just like when you write that major paper for a class project, you will need to gather lots of material before you start writing or in this case editing the project. You will need a lot of variety for each type of photo so you can pick the best that work together as a package.

If you are covering an event look for the broad view that gives a sense of scale of the occasion. A wide-angle lens like a 28 mm from a birds-eye or worm-view will add drama and make the presentation more exciting.

Use those leading lines and graphics for impact. Study National Geographic or Sports Illustrated.


My friend Bob Rosato, staff photographer for Sports Illustrated, spoke to a professional photographers group not long ago. Bob talked about how important it is to capture the atmosphere and grandeur of an event. He showed many images we have seen in the magazine which were shot with a wide angle. Sure, he had photos made with those super behemoth telephoto lenses we typically think they always use, but to capture the splendor he used wide-angle lenses.

Capturing atmosphere is difficult. The sensations of an event are gathered from sounds, smells and all our senses. You must rely on visual cues to evoke these emotions with your audience.

Shoot wide, but extremely close also. Show details as close as your camera will focus. Find a fall leaf that brings to mind autumn rather than only showing the wide-angle view of the forest.

Now we see why photojournalists carry two or three cameras. You see something and shoot, no need to change lenses to capture the moment.

Ah yes, the moment. Don’t limit yourself to a predetermined list of shots. Be ready for the unexpected. These serendipitous moments are what will add a human touch to your photography.

You cannot sit in a chair at an event and capture it all. You must move around and look for unique perspective and a variety of images.

No matter how many shots you take of an event you usually wish you had taken more because as you tell your story with images you need transition images. You need photos to lead the audience to the next point or subject.

In television shows they use bumps to help break up the changes. The TV show Home Improvement used little detail graphics of a tool, a fence or something with a sound to let you know you were changing thoughts.

When you show your photos and you feel little need to explain what is on the screen, then you have done the job. A good job.

Sunday, April 25, 2010

CIP Atlanta Projecting Pixels and Cookout

Dorie, my wife , and I hosted the Christians in Photojournalism Atlanta group at our house for a cookout and looking at each others work. These are just a few snaps from our time looking at each others work.


Photos from Projecting Pixels and Cookout Party on April 24th

Tuesday, April 20, 2010

Get out of your seat

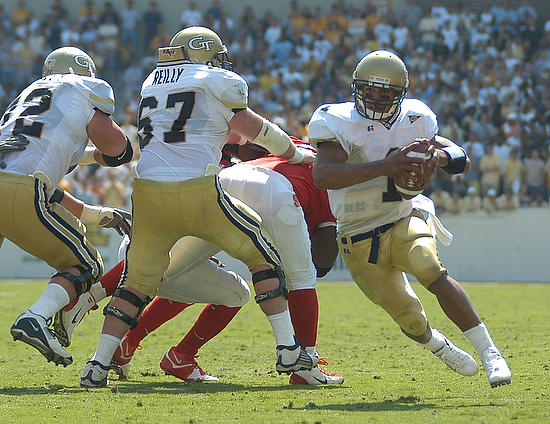
Nikon D2X, Sigma 18 - 125mm, ISO 400, ƒ/7.2, 1/200 [4 - Alienbees B1600s full power on catwalk with 50º parabolic reflectors, triggered by Pocketwizards.
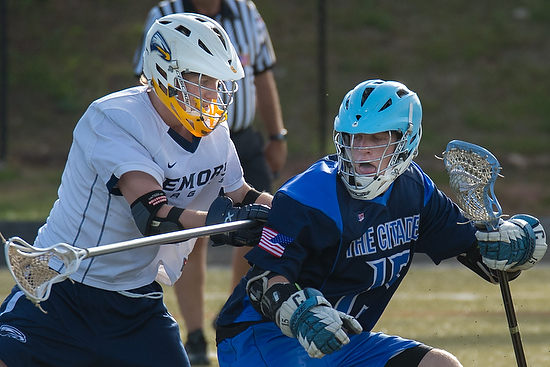
The other night I attended a lacrosse match at the local high school. I went as a spectator. This is rare for me to be at a sports event without my camera equipment.

It was interesting to watch the parents photographing the game. A couple of them were on the sidelines, but the majority stayed in their seats in the stands.

Everyone was shooting with digital cameras. From the simplest cameras to most professional equipment they all had similar focal length lenses that would zoom out to about 200 mm (equivalent on a 35 mm camera). 

Nikon D3, 14-24mm, ISO 450, ƒ/4.5, 1/1000
 At this high school lacrosse match the parents were not being kept off the sidelines by anyone. They kept themselves back from the action!

The difference between what each person was able to photograph varied greatly because of where they were in relationship to the action on the field.

If you want better photos of your kids playing sports (or doing almost anything else) get as physically close to the action as you can. Of course, use some common sense and don’t get in the way of the game or the fans and in a safe spot for you as well.

A famous war photographer said something that applies to sports photography just as it does to war photography. “If the pictures aren’t good enough, you’re not close enough.”

Another key to improving your shots, besides getting out of your seat, is to hold your camera still. The longer the focal length the shakier it can become. Use a monopod. They sell for about $30. I like the Manfrotto Modo 790B Monopod. This will help keep your camera steady and improve the image sharpness. It is easier and faster to use than a tripod.

Most folks stand up when taking pictures. It’s more comfortable than squatting or resting on your knees, but it doesn’t usually give you the best action shots. If you are low to the ground you are shooting up at the athletes. This actually makes them seem more heroic. Shooting from a low angle makes them appear higher off the ground than they are. Staying low on the sidelines is also courteous to the fans in the stands.

Nikon D2X, Sigma 15-30mm, ISO 400, ƒ/5.6, 1/200 [4 - Alienbees B1600s full power in corners bouncing, triggered by Pocketwizards.
Another trick: Be where they are going – not where they are. Get down field and shoot back at the players. Now when the big play happens it is coming to you, not away plus you can see their facial expressions.

Nikon D100, Sigma 120-300mm ƒ/2.8 with 1.4 converter, ISO 200, 1/2000
If the sport you are covering has a ball keep asking yourself this question: Where’s the ball? Most of the peak action, the strong expressions and the competition will be around the ball. This rule doesn’t apply to all your shots, but it is a good one to keep in mind.

If you were covering football you would be on opposite ends of the field depending on if you are covering the offense or defensive players. You want to see the player’s faces and close as possible. The grimaces will show the intensity of the play.

With digital cameras you can take ten pictures, a hundred pictures or even a thousand pictures for about the same cost. So take lots of photos to capture the best moments.
Your kids will probably play these sports for just a few years. Having good photos, in which they can recognize themselves, will be something they cherish for a lifetime.

So get out of your seat and get close to the action. You (and your kids) will be glad you did.

Nikon D4, Sigma 120-300mm ƒ/2.8 w/ 1.4 converter, ISO 900, ƒ/5.6, 1/2000

Let’s sum it up:
  • Get closer.
  • Use a monopod. Fuzzy Photos don’t count
  • Get down, and shoot up – make them heroes.
  • Stay ahead of the action.
  • Where’s the ball?
  • Show the faces/capture the emotion.
  • Take more pictures, it improves your odds.
  • Enjoy the photography and your kids.

Friday, April 02, 2010

Stop Selling Nails


When my wife Dorie graduated from seminary our family took an out of the ordinary vacation to Jamaica. We did the all-inclusive package. All we had to do was enjoy the trip. No worrying about when or where to eat or what to do. We just had fun. I cherish these memories.

You’ve probably splurged on something. Maybe you took a special vacation or found a wonderful restaurant. Most of us have done something fun that is outside our normal budget. These extraordinary times can form memories our families will talk about for the rest of our lives.

Workshops and Seminars
 
Each year I attend a few workshops and seminars to keep me up to date and increase my value to my clients. Years ago some friends suggested that I should splurge and invite the speaker I was impressed with out for a meal to some nice restaurant. At first I was worried that these important people would think I was nuts.


The first time I took a speaker out to eat I expressed this worry. She laughed and said, “No man, I was a peon myself once and not that long ago.” I learned more asking questions and listening during this one-on-one time at a meal with a key person than the rest of the entire conference. By the way, that first speaker I became friends and have kept in touch.

I’ve met others, who were struggling and barely had any money for their own food, but they still took a speaker to lunch. Much later on they told me that the investment in that lunch changed their lives and their business. 

Building Supplies
 
Hardware stores and real estate agents sell entirely different things. Hardware stores sell nails and wood and the prices vary little from hardware store to hardware store. Real estate agents sell what a builder did with what he bought in a hardware store and the prices range all over the place depending what was done with the basic materials.


As we talk with a prospective client does the discussions quickly turning to price and the bottom line? 

The Total Package

Let’s think back to those extraordinary vacations or the meals you treated those special speakers to. Price was not the determining factor. The value of what you got for your money prompted you to take that vacation or buy that person a meal.

If the quality of your work is superior and you have consistently treated your customers with honor, dignity and respect then you have established a brand that will draw clients to you.


If you are aware of how your work defines you in the marketplace and you communicate this effectively to potential customers you will do well. You can compare what you do to your competition or you can just point out all the things that you do for your clients and never mention the competition.

If prospective clients are talking price and bottom line then stop selling nails and wood and start talking about the quality of your work and what you will do for them.

Wednesday, March 17, 2010

It’s Not All About Me, But It All Depends On Me

One of the best things I have learned over the past year about how to grow my business is that it's not all about ME, but it all depends on ME.

Kenneth H. Blanchard who wrote the famous book The One Minute Manager also wrote Raving Fans. I rediscovered him through my client Chick-fil-A. They embrace his concepts and work hard at creating Raving Fans.

Definition of a Raving Fan: One who uses your services more often; pays full price; and tell others about you.
All businesses want and need Raving Fans. So, how do you get them?

First: Your product or service must be superior. Doing business “Good Enough” will make some clients rave about you, but they will not be FANS. Striving for nothing but the best will create genuine fans.

As a photographer I look for a unique angles; something they are not likely to see themselves. “Good Enough” is giving my client a professional version of something they could have seen and done without my help. My photos must WOW them. That’s my obligation to them as a professional.

Creative use of lighting can move my photography from just “Good Enough” to excellent. I need to explore the subject and find the point of view with the most effective use of light. For example, moving a person so that the light from a window creates the main light on their face rather than fighting the glare of the same window behind the subject. I may need to set-up strobes (flashes) to create my own “window light.”

“Good Enough” is scouting a location after joining my client at the shoot. Much better to shout in advance of the shoot and be able to suggest locations for the best light, composition or unique perspective to make photos that standout from the expected.

Second: To win Raving Fans – go the Second Mile in service. In my business I looked for things to do that were not required, but would be valued by my client.

Something I did from the beginning was to deliver my work to my clients on a professional-looking CD or DVD. I printed my logo and sometimes their logo on the disc as well as the date of the photo shoot and other useful information. “Good Enough” is writing the information on the disk with a Sharpie.

Another unexpected and appreciated extra is a quick turn-around delivering the images. When possible I give the client the disc before I leave the shoot.

By watching other businesses it is possible to discover some of the ways they attract fans. Chick-fil-A, for example, works at making a customer feel like a guest in someone’s home. Little things make this happen. They’ll hold the door for folks, carry the trays to the table, refresh their drinks and even give them food occasionally. 


Seeing what other businesses do and finding ways to apply the concept to my business isn’t always apparent. It is a constant struggle to find ways to be more service oriented. We call those who “do it naturally” Ladies and Gentlemen. (The rest of us gotta work at it.)

I believe the whole key to attracting and keeping Raving Fans is to first be sure to deliver a quality product and do so in a professional way. Only if we are doing this will the Second Mile Service have any real impact. No matter how many nice-little-things we do for a client if they are not happy with our product… The point: You Can’t Go The Second Mile If You Didn’t Go The First Mile FIRST.

I’ve found a great second mile touch is a hand written thank you card. Anything hand written is so rare these days that it has an almost unimaginable positive impact.

Third: Another component of creating Raving Fans is establishing an emotional connection with the client. It’s called Friendship.

When my customer becomes more than a paycheck, when I see them as a valuable person, when I come to care about how they’re doing and I’m concerned about their happiness that’s when I discover the true joy of “doing business.”

When business reaches this level going the second mile only seems natural.


This relationship is not going to form with all our clients, but when it does it was worth the trouble and we’ve made a Raving Fan.

A few months ago I ran into a man I knew when he was a teenager. We were talking when he stopped and said, “Last Sunday my pastor said in his sermon that we should tell people what they have meant to us over the years. Well, I want to tell you that you were a major influence on me when I was a kid and I want to thank you for that.”

I want forget that for a long time. Made me feel great and humble at the same time.

We probably didn’t know our clients when they were kids, but there are things we like and appreciate about them that, given the opportunity, perhaps we should tell them.

An easy way to make a fan and a friend is just to listen to them. Maybe over coffee or a meal, just give them the time of day. A friend, after all, is someone who will listen.

I believe this can all be boiled down to this statement: If you want to grow a business, look for ways to serve your customers.

Friday, February 26, 2010

Give yourself an assignment


I just got back from Hawaii and I’m excited. It was my fifth trip to Hawaii to teach, but photographically this was the best trip by far.

Why so? Well this time I had a couple of assignments.

On the drive over to the Hawaii Volcanoes National Park my daughter calls me and says, “Daddy, I need some photos for of the volcano for my class at school. We’re studying the Earth’s crust and I thought the volcano would be a good way to show it.”

Listen, with an extraordinary assignment like that you give it all you got! I knew I needed to do an outstanding job for this client. Besides, this gave me the perfect opportunity to play with my new Nikon D3s.

At the Volcanoes Park I meet this Park Ranger and decide to interview her since she was bound to know more about it than I did (wouldn’t take much).

When I told her about my assignment and the intended audience she knew just what to do. We did the interview in one take. I got the feeling she’d done this before – what a pro.

Here’s what we did from my daughter’s class. You can see it for yourself.


Here’s another assignment I did while on the island.

I’d been to the luau the Island Breeze produces in Kona. I asked the folks at the school where I was teaching if there was a way we could set-up a shoot with these dancers. Don’t tell me luck has nothing to do with anything. One of the dancers with Island Breeze was actually in my class! Brooke Valle, the student, is also a professional dancer and travels the world full-time dancing.

I was able to photograph the women dancers and one of the guys who is a fire dancer. They were excited. We photographed the women one night at the home of Kamehemeha the Great, the first king to rule all the islands. The next night we photographed the fire dancer on the beach.

I used this as an opportunity to show the students how to silhouette the dancers and expose for the sky at dusk, which makes for a great looking sky, but puts dancers in the dark. Then I showed them how to use remote Nikon TTL flashes to light up the dancers and make them pop.

Here are the examples:
Here the dancers are silhouetted.
They are now revealed with the flash.
One of my favorites showing the king's palace in the background.
The dancer is silhouetted.
Now he is revealed with the flash.

These self-assignments, well one assigned by my daughter, forced me to pre-plan. The photographs were better than in past trips and it was a lot of fun.

Want better travel photos? Do some research and preplan. You’ll be glad you did.


Here are some of the student’s first attempts working with studio lighting and off-camera flash after a few days in class.
 
Youth With A Mission Photography School 1 from Stanley Leary on Vimeo.