Showing posts with label interview techniques. Show all posts

Wednesday, July 20, 2016

Interviewing Techniques for Kona, Hawaii Multimedia Storytellers

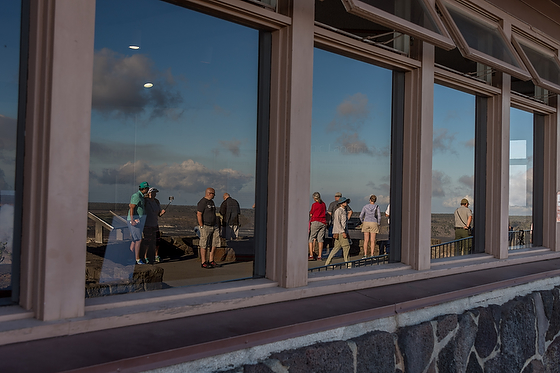
Nikon D5, AF-S NIKKOR 28-300mm f/3.5-5.6G ED VR, ISO 280, ƒ/8, 1/100
When I teach students photography, multimedia and/or storytelling I often find myself reflecting over the content.

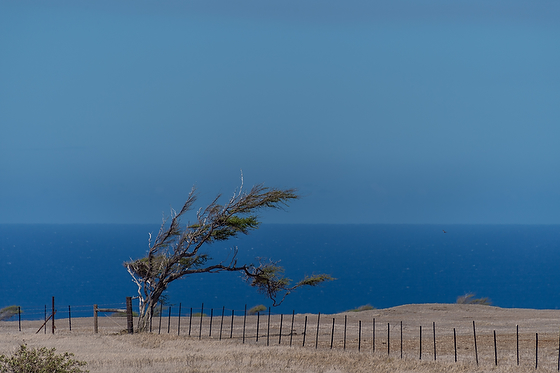
Nikon D5, AF-S NIKKOR 28-300mm f/3.5-5.6G ED VR, ISO 100, ƒ/5.6, 1/1250
When I was down at South Point on The Big Island of Hawaii you see how all the trees are bent in one direction.

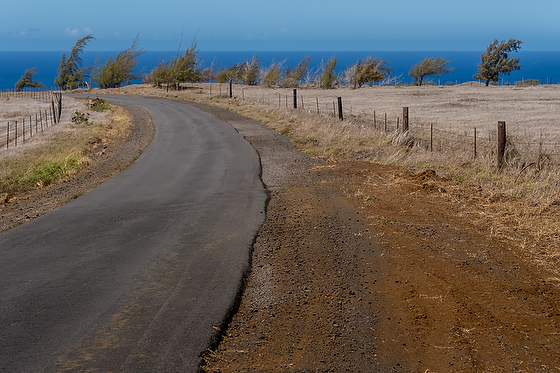
Nikon D5, AF-S NIKKOR 28-300mm f/3.5-5.6G ED VR, ISO 100, ƒ/10, 1/200
When I say all the trees I really mean all the trees are bent from a constant wind. The wind is so constant and good that they put windmills here for wind power.

Nikon D5, AF-S NIKKOR 28-300mm f/3.5-5.6G ED VR, ISO 100, ƒ/7.1, 1/800
While this strong wind is great it will affect the landscape. Well when I teach I am trying really hard to not make so much of an impression it looks like my students are too over powered.

Some of the things we discussed today was interviewing techniques. Now when I taught with my friends Jeff Raymond and James Dockery we compiled a list of tips that we give to the students. Here is that list plus some that I have added this week:

INTERVIEWING TECHNIQUES
  1. Remember the audience doesn't know the question from the interviewer if they are not recorded or on camera. Remind the subject to phrase their answer so that the question is understood in their answer, sometimes by repeating the question.
  2. Write down at least 5 good questions beforehand
    1. Listen to their responses and be ready to deviate from your list
    2. Listen as if you only hear their words, not the question you asked
  3. Ask open-ended questions
    1. Ask questions that CAN'T be answered with a 'yes' or 'no'
  4. Ask "how" and "why" questions
    1. If the person speaks in the abstract, ask "Can you give me an example of that?"
  5. Dig for anecdotes and details
    1. Ask the person to tell you exactly what happened moment by moment
    2. Ask specific details along the way.
  6. Understand them and their story
    1. Try to see the world through their eyes
    2. Remember, it's not your story. Get their story right.
  7. Ask your questions then be quiet. Use silence and don't be afraid of it. No noises to affirm them. Affirm with gestures. Your noises will distract from the sound quality. 
    1. Don't finish their sentences.
    2. Be a good listener. Sit quietly as they wrestle with what they are trying to say.
  8. Coach the person to speak with the passion they feel about the subject.
    1. Can you say that again, but with more feeling?
    2. Remember they may be pretty up tight in front of the camera and need to not just relax but bring the emotion through their voice.
  9. Get the basic details right
    1. Get the spelling of their name (business card, or have them write it down).
  10. Clarify
    1. If something they said didn't make sense, ask for clarification.
    2. Review your footage while you're still overseas, where follow-up is much easier than after you go home.
  11. Get to know your subject before interviewing them. This will not just help them be more relaxed but help you know how to interview them and perhaps help them relax.
  12. You can do the interview at the end of the coverage and not the beginning. I find it is easier to have someone sum up what we saw today than have them talk about a lot of stuff that by the end of the day I never caught on camera. This helps you from lacking in b-roll or images. 
  13. Ask the subject to summarize what you have seen that day. While you may not use all of this, it will help you with a starting place for the narrative.
  14. Mirror them. Keep them going by nodding and smiling.
  15. Keep them on topic. If you have two or more interviews in your package planned, then each person needs to know what they are covering. Sometimes I break it down as to let one person tell me why something happened and the other to explain what they did to make it happen. 
  16. Help them revise their comments. Often i need about 30 to 45 seconds of comments and a person may talk for more than 5 minutes. If I were to edit it later their will not be a good flow. I try and help them summarize what they just said or even edit. When I say edit--I mean cutting content.
  17. Get variety. I like to often record a longer comment and then follow up with them making it really short. Sometimes I use the longer comment. Get another direction just in case. After doing this for a few minutes often this gets their minds engaged and they find a new way to articulate themselves. Allow for this to happen.
Now just remember that you don't need them to tell you everything in words. You will help communicate a good part of what they do also with visuals that you will capture and use as b-roll. You need get them to tell you the things that the visuals don't convey. While you have a visual that shows something happening, it often doesn't help the audience know why.

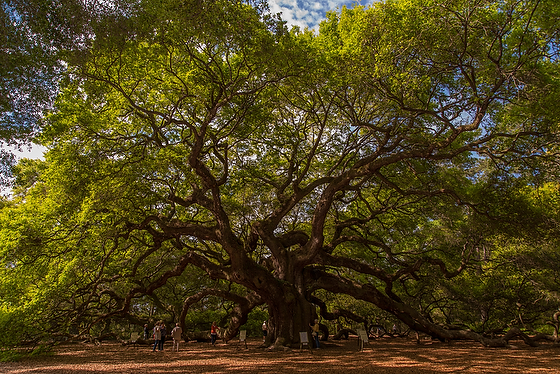
If you do a good job interviewing then the story will be unique the branches of the story can be like Angel Oak Park on Johns Island near Charleston, South Carolina. Angel Oak is estimated to be 500 years old. The character of the subject will shine through and be who they really are rather than all the wind forcing it's power on the tree.

Nikon D750, AF-S NIKKOR 14-24mm f/2.8G ED, ISO 400, ƒ/8, 1/250

Sunday, February 22, 2015

Guest Blog: Story is King!


Robin Rayne is an Atlanta-based photojournalist for international and domestic magazines and newspapers. Robin is also producing a documentary film on people with significant disabilities who have been mandated to relocate from state hospitals into community.


It was only 96 hours on an island in the middle of the Pacific, but the joy and rewards that came from leading a class of young, passionate student storytellers will rank high on my list of life experiences -- even though I learned as much for myself as I likely taught them.

I was apprehensive when the University of the Nations first asked if I would consider flying to Kona, Hawaii to teach for a week at its School of Photographic Communication (SoPC) on the Youth With a Mission campus. I was one of a handful of journalists recruited as instructors.

Nikon D750, AF-S NIKKOR 28-300mm f/3.5-5.6G ED VR, ISO 1000, ƒ/5.6, 1/100
I know some photographers for whom teaching, coaching and counseling seem almost effortless. They are full of knowledge and experiences that just cry to be shared.

I'd never taught a photo class before. But I pushed through my anxiety and said yes anyway. For weeks I pondered what I'd have to offer.  What could I share that was different from the others?

What kept coming back to me was 'the story.' Because what we do is really is all about the story, or narrative, or whatever we're calling it these days.

Without journalistic depth, all those creative, artful and technically brilliant images in the world will remain nice pictures for a gallery or photo magazine, but they fall short as real journalism.

Nikon D750, AF-S NIKKOR 28-300mm f/3.5-5.6G ED VR, ISO 4000, ƒ/8, 1/100
In 2015, our culture has become one of viewers – on our laptops, iPads, tablets and smartphones – than readers of the printed page.

As journalists, we need to use all the tools available to communicate: still photos, cinema, text, audio and design.

Photojournalists are first of all journalists. The world is brimming with photographers,  but it's our job to tell stories. Sometimes we have editors who direct us to specific people or situations to capture, but much of the time it's up to the photojournalist to find someone that moves a story forward.

Everyone has a story if we dig deep enough.  Too often we take the easy way, the low-hanging fruit. We don't dig. We don't get names, or if we do, we only get the top layer.  We often don't get the rich story because we don't ask the right questions, or we don't know how to ask questions and really listen to the answers.

Students interview coffee grower in downtown Kailua-Kona, Hawaii. [photo by Robin Rayne]
So that's what our class worked on for several days. As an exercise, I asked the students to pair off and interview each other, digging for something  that that was interesting, curious, unique -- or that had conflict.

We split into two production 'crews' and talked about a common narrative that had conflict. The students shaped and refined their questions for a handful of  prospective subjects and then left the campus in search of a multimedia story that could be told in two minutes.

Nikon D750, AF-S NIKKOR 28-300mm f/3.5-5.6G ED VR, ISO 180, ƒ/4.5, 1/100
A few learning moments quickly surfaced as the crews approached their mission.

Rule Number One: The story is king.

Other things to remember:
2. Do your research and think hard about what the story really is. Answer the question: What's the conflict? Why should the viewer care about your subject or the story?
3.Don't fall in love with your original idea. Have a "Plan B.' and a 'Plan C, D, E and F' if necessary.
4. Be willing to dig for the real story and follow wherever it goes.
5. Look for emotional, spontaneous moments, establishing shots and appropriate b-roll.
6. You can never have enough b-roll.
7. Know your equipment. f4 at 125th sec. outside on a bright day is probably going to be overexposed. And make sure the record button is 'on' when it is supposed to be.
8. Watch your monitor. Know your camera, microphones and cables.
9. Always bring a reflector, tripod and fresh batteries.
10. Listen to the subject's answers. If they're stiff, ask the subject to say it a different way.
11. Delegate responsibility so each crew member knows her/his job.
12. Watch out for things other crew members might have missed.
13. Mediocre images can be forgiven if the audio is solid and clean. Bad audio will lose viewers even if the images are stellar.
14. Kona coffee is awesome.
Students learn how to use microphones with their DSLRs to interview subjects. [photo by Robin Rayne]
Watching the crews learn by doing was the best way to teach. All the things I knew to be true were hammered home to me as we watched the final pieces together. We learn from screwing up more than we learn by our successes.

I hope the students learned some things they might not have known before. Sitting among them rather than in front of them was a great equalizer. Because none of us has 'arrived' and knows everything. We ought to be learning until the day we die.

Students talk to a local shop employee in Kailua-Kona, Hawaii. [photo by Robin Rayne]
Now I have a few more friends who will go on to do amazing things in their lives.  I'm deeply blessed to know them. I really liked what we accomplished together that week.
They all rocked, and I hope we'll stay connected.

Aloha,

robin rayne nelson
http://assignmentatlanta.com/

Tuesday, May 22, 2012

Tips for making video/audio interviews


Over the past six years I have been doing multimedia packages for my clients. Some of these are still images with audio and others are video with some still images.  The one thing that is constant in everyone is the interview.

I have taken many classes from other pros and read many books, but most of my tips here are from what I use now for most of my packages.

I want to break down the tips into two lists: technical and content.

This is a Nikon D4 with the Nikon stereo microphone

Technical tips

Rode Video Pro Mic that I use on my Nikon D4
  1. Use a good microphone and recording device. With today's iPhones and other smart phones you can use this as your recording device, but get a good microphone if you choose to use this. I prefer using a shotgun microphone on my camera/video and/or a lavalier microphone clipped onto the shirt of the subject.
  2. Use headphones. You need to hear what is being recorded and the only way to do that is to put on headphones and hear what your microphone is picking up. This will also help you set the recording levels. This is when you will hear hums from electronics and air conditioning units to water falls. When you hear these things you can then see about moving or turning off electronics for the interview. This also will alert you to any short in the line of the microphone.
  3. Pick a quite space. With your headphones on and testing your sound you need to listen and try and pick the quietest place unless you want the ambient sound of the background.
  4. With video watch backgrounds. Look for a background that is simple or compliments the subject. Be sure it isn't distracting and taking away from the audio.
  5. Back light with fill. I prefer when outside to back light the subject. This helps give them a rim light and then I use a fill light. The rim lighting separates them from the background and keeps their eyes from squinting. I use a fill light off to the side to help shape the face and fill in the shadows.
  6. Set camera and have subject talk to you. I don't always do this, but it does relax the subject.
This is the LitePanel MicroPro that I use for a fill light or main light.


This is an example of a package I did for our church. I drove up to Chattanooga, TN in between other work jobs and shot this in couple hours and drove home.  Posted it a little later that night.

Interview Techniques
  1. Get to know your subject before interviewing them. This will not just help them be more relaxed but help you know how to interview them and perhaps help them relax.
  2. Do the interview at the end of the coverage and not the beginning. I find it is easier to have someone sum up what we saw today than have them talk about a lot of stuff that by the end of the day I never caught on camera. This helps you from lacking in b-roll or images. 
  3. Ask the subject to summarize what you have seen that day. While you may not use all of this, it will help you with a starting place for the narrative.
  4. Mirror them. Keep them going by nodding and smiling.
  5. Ask your questions then be quiet. No noises to affirm them. Affirm with gestures. Your noises will distract from the sound quality.
  6. Remind them what you have that they need not talk about. Often people will want to tell you everything not understanding you have visuals that will help the audience. You need them to tell the things that the visuals don't convey. While you have a visual that shows something happening, it often doesn't help the audience know why.
  7. Keep them on topic. If you have two or more interviews in your package planned, then each person needs to know what they are covering. Sometimes I break it down as to let one person tell me why something happened and the other to explain what they did to make it happen. 
  8. Help them revise their comments. Often i need about 30 to 45 seconds of comments and a person may talk for more than 5 minutes. If I were to edit it later their will not be a good flow. I try and help them summarize what they just said or even edit. When I say edit--I mean cutting content.
  9. Get variety. I like to often record a longer comment and then follow up with them making it really short. Sometimes I use the longer comment. Get another direction just in case. After doing this for a few minutes often this gets their minds engaged and they find a new way to articulate themselves. Allow for this to happen.
These are just a few tips of things I am doing today with my multimedia packages. I am now adding a second camera to add a variety of angles to interviews.

Before I get on a plane and travel to do a story, I have a good idea of what the story is before I take off. After I get there I listen and watch. Often the story changes and is modified. I go where the story takes me, but I am ever mindful of two things: the audience and the subject. I am trying to connect them to each other. What can the audience learn from the subject? Why should they care?

I am constantly looking and listening for ways to tell the story in the shortest and most effective way possible. I hope these tips may help you.