
White or even clear objects on a white background is very difficult to do and can become quite frustrating for even the experienced photographer.
This is a basic setup for a catalog photo shoot where the object needs to be stand out.
I have couple of examples here. Next you will have the lighting diagram of the setup and finally there is a list of what I used.

Lighting Ratio
The trick in this lighting setup is the ratio of the background to the subject. I recommend you put 1 ƒ-stop more light on the background than on the subject.
How you measure this is with a flash meter. Always start with the light on the subject. I measured the light at ƒ/22 on the subject and then measured it on the background at ƒ/32. I then bracketed shots from ƒ/16 to ƒ/32 and pulled them up in Lightroom. After carefully looking at the detail in the subject and the background I chose to shoot at ƒ/20.
I also recommend evenly lighting the object for this type of catalog photography. This is why there are two 32" x 40" soft boxes at 45º angles from the camera to help wrap the object in light.
The middle 30" x 60" soft box in the diagram below is suspended flat over the table using the Manfrotto boom arm.
To avoid lens flare in this setup be sure the camera is ever so slightly not perpendicular to the background. Straight on can give you a lens flare.

Supplies
Here is a list of the supplies I used to make the photo.
This is a basic setup for a catalog photo shoot where the object needs to be stand out.
I have couple of examples here. Next you will have the lighting diagram of the setup and finally there is a list of what I used.
 |
| Nikon D4, 28-300mm, ISO 100, 1/160, ƒ/20 |
Lighting Ratio
The trick in this lighting setup is the ratio of the background to the subject. I recommend you put 1 ƒ-stop more light on the background than on the subject.
How you measure this is with a flash meter. Always start with the light on the subject. I measured the light at ƒ/22 on the subject and then measured it on the background at ƒ/32. I then bracketed shots from ƒ/16 to ƒ/32 and pulled them up in Lightroom. After carefully looking at the detail in the subject and the background I chose to shoot at ƒ/20.
I also recommend evenly lighting the object for this type of catalog photography. This is why there are two 32" x 40" soft boxes at 45º angles from the camera to help wrap the object in light.
The middle 30" x 60" soft box in the diagram below is suspended flat over the table using the Manfrotto boom arm.
To avoid lens flare in this setup be sure the camera is ever so slightly not perpendicular to the background. Straight on can give you a lens flare.

Supplies
Here is a list of the supplies I used to make the photo.
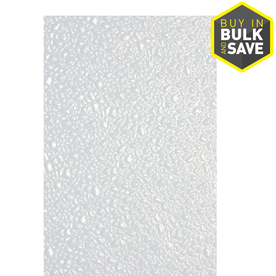 |
I recommend using a vinyl floor or you can use Sequentia 1/8-in x 4-ft x 8-ft White Fiberglass Reinforced Wall Panel that I bought at Lowes. I use the backside which is smooth for the photos. You can also roll this up for storage. |
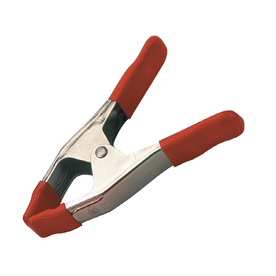 |
To hold the background in place I recommend BESSEY 2-in Metal Spring Clamps. I have a bag of these I have handy for projects. They sell for just under $3 each. |
 |
You need something to hold up that background. You can get the Savage Background Port-A-Stand Kit for about $110. |
 |
The primary light for product work is a soft box. I have the 30" x 60" soft box from Paul C. Buff. I like it for many reasons, but one of the reasons is how easy it is to setup and take down. |
 |
It works like an umbrella and has a lock that you screw tight to hold it in place. |
 |
I use the Alienbees B1600 monoblocs for my work. I like that the power is controlled with each head and I do not have to do math in my head as I did for power pack that split the power to different head. The Alienbees B1600 sell for $359.95 each. Since you are buying the directly from the manufacturer the price break is significant as compared to other lights that you buy from distributors. |
 |
Manfrotto 024B Boom is used to hang the large 30 x 60 soft box over objects. It sells for about $149.95 and comes with a 10 lb counterweight. I have a variety of other light stands I use. I put this on my JTL1200 Chrome Air Cushioned Stand (5016) which sells for $69.99. |
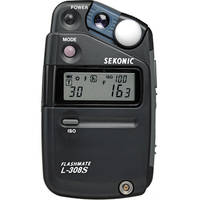 |
Sekonic L-308S Flashmate - Digital Incident, Reflected and Flash Light Meter sells for $233. |

