 |
| Available light |
Foot Lights
One of the lights used in theater is the foot lighting. Personally I think this helps the older actors look younger. So, while they can act after some years of experience better than they did when they were young, they need the foot lights to help soften the wrinkles of the skin.
If you go to Broadway and see the stages, most of the time you will see some lights built in the front of the stage floor near the audience. These lights give you that ghostly lighting like children like to create using a flashlight under the chin. If you bring it a little away from the face it looks more like your theater foot lights.
 |
| Foot Lighting balancing with available light |
Butterfly Lighting
 |
| Butterfly Lighting and Foot Lighting combined with available lighting |
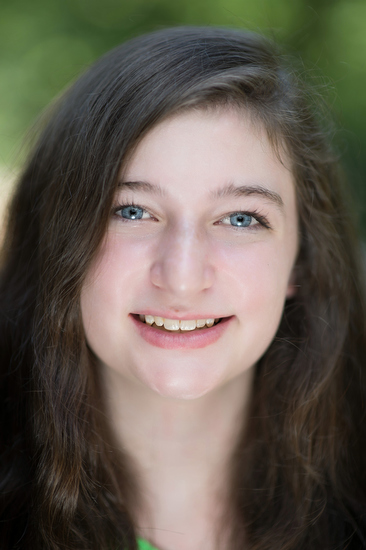
In the last photo of my daughter I kept the foot light and the butterfly light the same power and underexposed the overall photo by one stop.
The Setup
 |
| Setup: You can see the SB800 on the lower light and the SB900 on the upper light. |
To soften the light I am shooting through the white umbrellas with the soft domes on the flashes.
To keep the background blurred I chose to shoot with the Nikon 85mm ƒ/1.4 lens at ƒ/1.4 opening. If you look closely you will notice that the front of her nose is out of focus as the edges of her face just behind the eyes.
I am focusing on her eyes.
 |
| Setup |
For the photos above the flashes are set to 0 compensation and the camera is set to -1 EV using the exposure compensation dial on the Nikon D4.
I am shooting in Aperture mode.
- ISO 100
- ƒ/1.4
- 1/500
| Nikon Telephoto AF Nikkor 85mm f/1.4D IF Autofocus Lens |
The Nikon 85mm ƒ/1.4 comes with a lens hood which is made of metal. You can always buy a rubber off brand hood if you choose.
Why not use a reflector?
Most photographers will choose to use a reflector to act as a foot light, which is a perfectly good thing to do. However, the advantage of using a flash with TTL control is you can control even more so the affect of the foot light.
The best you can do with a reflector is come close to the exact same value of light of the main light, however for some people you may want to pump it up to be even brighter.
My suggestion is to go out and try some of this yourself. Get comfortable with the setup and trying different things so you have one more lighting option for your portraits.

No comments:
Post a Comment