Monday, July 30, 2012

Get Close: REALLY CLOSE!

Nikon P7000, ISO 100, ƒ/8, 1/220 using manual focus as close as the camera will focus in macro.
If your pictures aren't good enough, you're not close enough. -  
Robert Capa - before he got too close to mine that killed him, while covering Indochina.

Making a memorable impression requires your image to have impact.  One of the most effective ways photography does this is with macro photography.

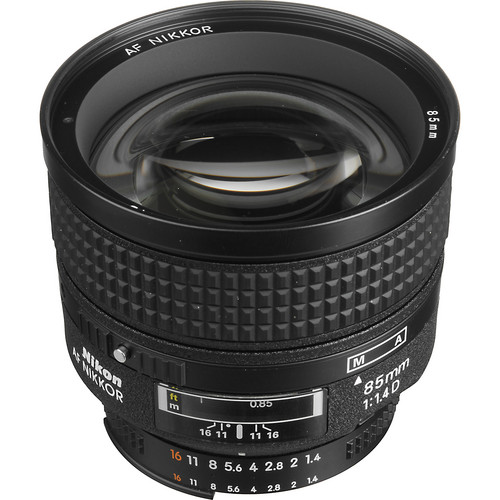
The minimum focusing distance for my Nikon 60mm ƒ/2.8 is 0.72 ft. (0.22m). With the Nikon P7000 I can do pretty much the same with it focusing at 0.8 inches (2cm).

While this photo is not all that exciting of my finger, I did this simple photo to make my point (good pun huh?). Taking something very small and making it very big is a way to have a photo with impact.

Most people do not take the time to get close to things and seeing things close is for the most part very different. Being different helps create impact and get attention.

Nikon P7000, ISO 100, ƒ/5, 1/250
The reason I chose to shoot the macro shots on my Nikon P7000 over the Nikon D4 with a 60mm ƒ/2.8 lens is I like shooting at the lowest ISO and fastest shutter speed possible. The problem when shooting with the larger full framed FX format of the Nikon D4 is the lens is further away from the sensor. The farther it is from the sensor means the depth-of-field changes to make what is in focus at ƒ/8 not the same.

The ƒ/5 on my smaller sensor on the Nikon P7000 is more like ƒ/11 on the 60mm macro lens on the Nikon D4. But I can hand hold the Nikon P7000 where shooting at ISO I would have to shoot at such a slow shutter speed to get a similar photo I run the risk of camera shake.

Nikon P7000, ISO 100, ƒ/5, 1/200
 I wrote an earlier articles talking about macro work here:

Jan 28, 2008
Nothing can sharpen your understanding about the nuances of photography more than macro photography. This is where you photograph objects extremely close, where the image projected on the "film plane" (i.e., film or a ...
Aug 21, 2011
Pick a macro lens or use your point and shoot on the macro (flower) setting. Set the lens to the closest focus setting. Set the f/stop on f/8 or greater. Very important if using a macro lens on DSLR; Get as close as you can without ...
Nov 08, 2011
If this is your normal lens of choice try something different like a macro or extreme telephoto. It is forcing you to look at the world differently than you are doing now. Change your routine. If you eat your breakfast always in the ...
Jan 27, 2011
2) Distance to subject. The closer you get to a subject the shallower the depth-of-field when the ƒ-stop stays the same. In macro photography for example when you get as close as 1:1 ratio you often have to be at a ƒ -stop at a ...
What I recommend with macro work is shooting with higher apertures to get the object enough in focus in the depth-of-field that you can see something is sharp.  Too shallow a depth-of-field and it will look like you missed your focus.

If you need to use a small flash off camera with a cord to get the flash right over the object. If you shoot with on camera flash the flash will not even land on the object because it is so close to the lens.

Try photographing as close as you can with a variety of objects. See if you can get some photos that have impact.

Friday, July 27, 2012

Camera bodies and the importance of simplicity

Nikon D4 with Nikkor 28-300mm
Importance of Simplicity

It is very common when I am out taking photos as a professional that people will often hand me their camera and ask me to take a photo of them with their friends.  They see my gear hanging around my neck and shoulders and figure, he knows what to do.

Camera manufacturers have not gone the way of Steve Jobs when it comes to camera design. Frankly, I think most every camera is quite difficult to use. Even these point and shoot cameras that people hand to me and want me to take a photo of them with their friends are complex.

One of the first things I often and wishing I can do to improve those photos for folks is to turn on their flash outside. This will help get rid of those awful shadows in their eyes making them look like racoons.

Just try and pick up four or five different cameras and quickly turn on the flash. It is quite difficult.

Ideally when I make a switch to a new camera system I would like to just trade all my cameras at once and then buy the latest gear. This is how I did it in the days of the film cameras.

However, today these professional cameras are not $1,000 for the top of the line cameras. Just one Nikon D4 costs $6,000 or what I would have spent to replace all five of my film cameras.

With film I carried five cameras. I had two black and white cameras and two color cameras. I had slower daylight film for outside and high speed tungsten indoor film in the other cameras. I also had a backup camera.

The good news today is I do not need five cameras. I need two or three cameras. Today, most pros carry two cameras for one major purpose--backup. You cannot afford to be on a job and the camera stop working and not have another camera to finish the job.

The other reason most pros also like a second camera is to avoid switching lenses on bodies too often. Each time you switch a lens you run the chance of dust getting on the sensor. The other problem is the time it takes to switch lenses can be the difference of getting or missing a shot.

Different cameras can cost you a shot. The difference in the Nikon D3s and the Nikon D4 is not so great that in a hurry you know which one is in your hand. However, the minute you decide to change how you are focusing you will realize you have the other camera in your hand when you try and change it.

Since I have been shooting digitally, I am usually having to buy a new camera at a time and sell some old gear. It just is difficult to order two $6,000 cameras for a total of $12,000.

Every time I make the switch to a new camera till I have all identical cameras I find myself getting very frustrated. It isn't that the new camera isn't better designed, it is the problem that the improvements made changes.

It would be easier to have four cameras. Two studio and then two DSLR journalistic cameras. This way when you are shooting high resolution stock images of products you had your primary camera and backup all the same. Same for the journalistic camera that helps you do video in the field and shoot at high ISO.


Financial Revelation

Back in the days of film, my gear was easily 1/4 to 1/3 the cost of what I need today.

When I shot film I didn't need a computer, PhotoShop or Lightroom and all the gear to insure color accuracy of the monitors. 

A professional photographer today will most likely have two pro cameras costing $3,000 to $25,000 each and a computer digital workstation (Computer, Photo Software and calibration devices) which run from $5,000 to $15,000.

So when you are shocked at why their prices are higher today when there is no film you know it is due to the cost of digital.

In the days of film photographers could keep their cameras for easily five years. Today, you can keep your camera that long, but your competition will have gotten the latest digital camera that let's them make photos you cannot on your present camera. You keep up to stay competitive, which now costs more than ever.

How to keep it simple?

Buy all the same type of cameras and stay with the same manufacturer of camera so the learning curve is shorter. While the cameras are quite complex the key to simplicity is not to introduce different cameras.

This is how I love to carry my cameras, Two Nikon D4 cameras with one having a 14-24mm ƒ/2.8 and the other with the 28-300mm ƒ/3.5-5.6 VR. Yes I have many other lenses I will use, but this is my default.
I shoot now with two Nikon D4 cameras. I want to keep it simple. I also carry my Nikon P7000 with me all the time. I like to keep my eye fresh so when I am on the job I am thinking about the shot. It would be just like a musician who practices every day so that when they perform they are at their best.

Wednesday, July 25, 2012

Butterfly Lighting and Foot Lights

Available light
First always start with no lights before adding lights.This photo at top shows you the nice diffused lighting of open shade on our deck.

Foot Lights

One of the lights used in theater is the foot lighting. Personally I think this helps the older actors look younger. So, while they can act after some years of experience better than they did when they were young, they need the foot lights to help soften the wrinkles of the skin.

If you go to Broadway and see the stages, most of the time you will see some lights built in the front of the stage floor near the audience. These lights give you that ghostly lighting like children like to create using a flashlight under the chin. If you bring it a little away from the face it looks more like your theater foot lights.

Foot Lighting balancing with available light
Now in the photo above we are still getting some overhead lighting from the sky in this outdoor photo, but look in the eyes and you can see the lower light being very bright.

Butterfly Lighting
Butterfly Lighting and Foot Lighting combined with available lighting
If you put a light straight above the lens pointing down at a model you will get what we call butterfly shadow under the nose. The model needs to be looking straight into the camera and no foot lighting to see this affect.

In the last photo of my daughter I kept the foot light and the butterfly light the same power and underexposed the overall photo by one stop.

The Setup

Setup: You can see the SB800 on the lower light and the SB900 on the upper light.
To trigger the Nikon SB800 and Nikon SB900 I am using the PocketWizard Mini TT1 on the camera and the Flex TT5 transceiver on the flashes.

To soften the light I am shooting through the white umbrellas with the soft domes on the flashes.

To keep the background blurred I chose to shoot with the Nikon 85mm ƒ/1.4 lens at ƒ/1.4 opening. If you look closely you will notice that the front of her nose is out of focus as the edges of her face just behind the eyes.

I am focusing on her eyes.
Setup
To control the amount of power coming out of the flashes I am using the PocketWizard AC3 which attaches to the Mini TT1.

For the photos above the flashes are set to 0 compensation and the camera is set to -1 EV using the exposure compensation dial on the Nikon D4.

I am shooting in Aperture mode.

  • ISO 100
  • ƒ/1.4
  • 1/500
These are the settings on the camera for all the photos above.

Nikon Telephoto AF Nikkor 85mm f/1.4D IF Autofocus Lens
When taking these photos it is very important for you to use a lens hood to avoid lens flare.

The Nikon 85mm ƒ/1.4 comes with a lens hood which is made of metal. You can always buy a rubber off brand hood if you choose.


Why not use a reflector?

Most photographers will choose to use a reflector to act as a foot light, which is a perfectly good thing to do. However, the advantage of using a flash with TTL control is you can control even more so the affect of the foot light.

The best you can do with a reflector is come close to the exact same value of light of the main light, however for some people you may want to pump it up to be even brighter. 

My suggestion is to go out and try some of this yourself. Get comfortable with the setup and trying different things so you have one more lighting option for your portraits.

Sunday, July 22, 2012

High Speed Sync Flash: Out of focus or disappearing background

This is my wife who is a wonderful model.
To get this photo of my wife Dorie, I used a Nikon 85mm ƒ/1.4 lens and used my hot shoe Nikon SB-900 to help light her for the photo.

Here you can see the setup. A Nikon SB-900 on PocketWizard Flex TT5, which is held on to the Manfrotto 5001B Nano Black Light Stand with a Manfrotto 175F Justin Spring Clamp with Flash Shoe.  I am using a shoot through white umbrella to spread the light more evenly. To trigger the flash from the camera I am using the PocketWizard Mini TT1 with the AC3 to control the flash output in the TTL mode. photo by: Chelle Leary
First

Nikon D4, 28-300mm (40mm), ƒ/16, 1/100, ISO 1250
This is the typical starting point with photos outside using the sunny ƒ/16 rule.  As you can see my wife is in the shade and the background is in the sun.  The problems with this photo are that the light on the background is brighter than my intended subject and also sharp and draws your attention away.

Second

Nikon D4, 28-300mm (40mm), ƒ/16, 1/100, ISO 100, Flash at +2 TTL
To solve the brightness of the background I used the simple sunny ƒ/16 rule. I shot at ISO 100 at 1/100 and ƒ/16, which darkened the background significantly.  Now if you like seeing all the sharp detail in the background this just might work. However, I want more attention on my wife and not the background.

Third

Nikon D4, 85mm, ƒ/1.4, 1/1600, ISO 1600
I switched to the 85mm ƒ/1.4 to get that bokeh I like. Bokeh (Japanese) has been defined as "the way the lens renders out-of-focus points of light." When I shot it without flash it looks fairly OK, but the background again draws your eye away from her face.

Nikon D4, 85mm, ƒ/1.4, 1/1600, ISO 3200, Flash +2 TTL
As you can see by adding the flash a couple things happen. Better light on her face the color temperature is a lot better.  The flash helps to match the sunlight in the background.


Fourth

Nikon D4, 85mm, ƒ/1.4, 1/500, ISO 100, Flash 0 TTL
I decided to have my wife move just a little until most of the background was now in the shade. The background is not all that bright.

Make the background disappear

Nikon D4, 85mm, ƒ/16, 1/60, ISO 100, Flash 0 TTL
If you take the overall exposure down as I did here, shooting at ƒ/16 doesn't really make a difference on a background that is now extremely dark.


Wednesday, July 18, 2012

You need a battery tester

You need to not just carry extra batteries, but a battery tester as well.
Spare batteries

Everyone knows you must carry extra batteries. I am using rechargeable batteries most of the time today.  I have a few types of rechargeable batteries, but highly recommend eneloop batteries.  These are great and highly recommend them.

Here is a good blog on the eneloop http://www.stefanv.com/electronics/sanyo_eneloop.html


As we all know the battery will run out of juice sooner or later. This is why we carry extra batteries.


Battery Tester Saves

Years ago I was using rechargable batteries, but found them a pain.  The earlier ones I used in the 1980's just didn't hold a charge and while I had them in the bag charged, they would loose so much power I found them dead when I got ready to use them.

For many years I was using the alkaline batteries and then came along the lithium batteries. These were great.  They weighed so much less and lasted 8X longer than the alkaline batteries.

The newest Lithium AA batteries cost about $2 each and last up to about 8X longer than other traditional batteries.
If you have used them you know they are expensive and this was inspiring me to test them and see if they were all bad, so I would bring those batteries I replaced home. I would test them with a battery tester and found most of them were still good.

Here you can see my Nikon SB-800 in my ThinkTank bag and my spare rechargeable batteries.
While having all these batteries with me is great when I would replace the batteries I would often toss the ones I took out that were Alkaline or Lithium, until I found out that of the 4 batteries three were still good and only one was bad.

I am finding that on my Nikon SB-800 and Nikon SB-900 that usually only one battery is dead when the flash says the battery is dead.
Here you can see the pocket size battery tester I use all the time.  They cost between $3 to $10.
I carry my charged batteries in this PowerPax holder. This carries 12 AA batteries.
I carry the battery tester in my ThinkTank Airport Security™ V 2.0 Rolling Camera Bag.

When I pull the batteries out and test them. I find the one battery that is dead. I am often only replacing one battery.

Be sure in your camera bag you carry a battery tester--it is a great investment.

Sunday, July 15, 2012

Marketing Idea: Commit to Three

This shows how your effort the first time may be great and the reward very low, but over the next three times the effort diminishes and the reward increases. if you quit because effort doesn't give the reward too soon you will miss out on a good idea.
Before you implement a new marketing idea you need to be ready to commit to executing it three times, before you decide if it is a good idea.
--Steve Robinson, Senior Vice President, Marketing for Chick-fil-A


No matter the idea you come up with to use to market your business the first time you try it is not the best time to evaluate it's success or failure. Your effort the first time to pull off something is pretty high and it takes time for a good idea to truly take hold of your audience.

First time

The very first time you try something you will spend a great deal of time, effort and money to pull off an idea.

Effort

The first time you try anything it is quite difficult. Just imagine if you learned to ride a bike using your present method of evaluating a new market idea. Would you have ever learned to ride the bike?

I think we all understand that the amount of effort due to the learning curve can be overwhelming the first time we try anything.

The first time I created a postcard to send out I had a lot of learning to do. I had to find a vendor. From my previous experience with business cards I realized I could spend a lot of money or no so much for the exact same quality. I had to shop around and investigate.

I went with the company SharpDots after getting a recommendation from a friend. It was a great recommendation.

My first layout was done by my good friend and creative director Tony Messano. We decided to use one photo on the front and my logo and return address as well as my web address on the back.

My first postcard cover shot

The back of my first postcard. I had a different logo then.
I also needed a mailing list and bought one of those as well. That took some time to find the best fit for me.

I printed the labels and bought the postcard stamps to mail them. I put the lables and the stamps on that first run of about two thousand postcards.

Reward

The phone did not start ringing a few days after the mailing. Not a lot of response to that mailing.

Second Time


Effort

Now this second time I didn't have to do all that much work as compared to the first time. I already had a printer, a mailing list and someone to help me with the design.

Some of the postcards came back and I had to investigate this time to get an address if they moved or delete them if they were out of business. How I did this the first time took some time to get a process down that worked.

Reward

I was getting some response. Still not overwhelming response.

While the phone wasn't ringing off the hook, most everyone I sent the postcards to now have only seen my name two times in the mail. Now I hadn't started a e.Newsletter at this time. I didn't have a blog at the time either. So I was just sending emails to check on these prospects.

What was happening at that time was introducing myself and what I did to these prospects. I was branding myself. They were starting to see my images and my logo together. I was slowly starting to build a brand.

Third Time


Effort

While I had down my process I decided to change up the layout on the back of the card. This was Tony Messano's idea. He said maybe running a series of photos on the back along with the photo on the front would communicate I wasn't a one shot wonder. After all everyone has at least one good photo they can make, my goal was to help separate myself from my competition as someone who can deliver multiple storytelling images.

My last postcard cover shot.
Tony had a different design, but I modified it a little here for the latest postcard. It has my new logo and we went to four color on the back. Not a lot of cost through SharpDots.
Reward

Today, I am getting more jobs and the clients comment often on my postcards as being a deciding factor on contacting me.

Summary

If after three times you are not getting any rewards out of an idea that is a good time to stop doing it. However, as you can see from the first diagram if you base your decision on the first attempt you would cancel some great ideas.

If you are just starting out, this is when you are trying to create a brand awareness of you. This is like you being a young entrepreneur like S. Truett Cathy who started Chick-fil-A. He started first running a diner in Hapeville, GA in 1946. He worked hard and it took time before he even invented the Chicken Sandwich. Since the first Chick-fil-A restaurant opened in 1967, the company has posted 43 consecutive annual sales increases. This was not an over night success, but one where they tried ideas and kept them if they worked.

Take your time to find a good idea and before you implement be sure you are ready to do it three times or you might quit before the big payoff.

Friday, July 13, 2012

Cable Management and being prepared


When I travel I have a lot of different cords that I need to have. I need power cords for my computer, cellphone, ipad, and card readers. Thinktank has designed a few different Cable management bags. I use two of them.

To hold all these cables I use the Cable Management 30.


To store my RadioPoppers I use the Cable Management 10. You don't have to use these bags for just cables. When you go to your bags and need to find something these bags help keep you organized and more efficient when shooting.

Be sure you are prepared before you go to a job. Have everything you need or might need with you. Nothing is worse than being on a job knowing what you need you own, but is at home or your office.

Monday, July 09, 2012

Shooting on Spec and Storytelling

Storytelling First 

This is the Suzuki Institute in Metro Atlanta where teachers learn from each other on how to teach better. Basically a best practices workshop for the Suzuki method.
If you have a workshop where teachers are learning best practices, you need to show a teacher teaching a student and other teachers watching.

I think this first photo alone helps tell the concept. Now each photo I took had small differences. In the first photo the teacher is using a very small bow to teach a technique. This photo is unique for the small bow.

I love the photo of this student practicing in a room with an adult. Not sure if this is his parent or teacher. The problem with this photo if I shot only this is it doesn't show other teachers learning from this moment. However, it is another aspect to the workshop.
While the workshop is to help teachers learn to teach better, in the process a student is also learning. Sometimes like in the photo here a student may go and practice before playing for the class. They want to do their best and also then have the teacher help them get better and not just correct something because they were sloppy.

Series


Every room I went in I shot a variety of shots. Here in the cello class I wanted to show that the Suzuki school was teaching more than just the violin. I also am showing an age group of young elementary students being taught.

The first photo is an establishing shot. The second is a tighter shot of the teacher interacting with the students. You can see this in her face expression.

The last in the series shows the children's attention to the teacher and learning.

Perspective


These two photos of the teacher teaching shows why a photographer needs to go up in front and shoot back in a class room.  The first photo only showed a teacher and one teacher observing. Now the second photo shows the same elements of the three, but adds even more from the classroom.

Be sure you work the room and this means you move around, not stay in one place and zoom from wide to a tight shot. You move around making even a simple 50mm lens do a wide, medium and a tight shot.

Different location


I went to different rooms capturing different situations. Here we have middle schoolers working as a group during a lesson.

Great Subjects


As you can see from this series this teacher is animated. This is great when the medium I am using the capture and tell the story is visual. In the first and last photos you see the gesturing of the teacher and the middle two photos are different perspectives to give you variety of overall and tight shots to help tell a more complete story of teaching.

Touching moment


The very first photo I showed in this blog and this one are great because a person is reaching out and touching another person. This becomes a much more intimate moment than all the other photos. This communicates a caring touch and sensitivity that when people are more distant lacks.

Almost monochromatic


This has just a touch of color with all the white in the photo. The girl is taking a moment to practice outside on the porch of the church where the workshop is being held.

The simplicity of the pallet of color is what drew my eye and how young she is yet so intense also communicates how important this workshop is to the students even when the teachers and parent's are not around.

Now the business lesson

I just showed up for a total of 20 minutes and did this as a favor for some friends. I posted them on a website where they could be bought. No one has bought a single one and I doubt they will.

I saw just as many people pulling out their camera phones taking photos and posting them to their social media. For many people this is their family album and since they have a photo that will do, no one is going to purchase a better photo if their photo suffices their needs.

Why did I do this if I knew this would most likely happen? Hey I like to teach business practices. This is a great example of what not to do.

If someone asks me to do this I normally charge a fee. I assume that what they pay me will be all that I will get. They may tell me to show up and parents will love to buy photos and I will make money that way.

30 years of experience is teaching me this rarely works and getting less likely with today's cameras and cellphone cameras.

I recommend charging a fee that makes it worth your time.  Offer two or three options for them. They can pay you a fee and get to use all the photos for their organization website and you will post the photos for people to purchase at a normal print rate.

Another option is you charge the same base fee but for a slightly larger fee you give rights to anyone to download a low resolution photo they can use for social media. (Sales will suffer, so this is why you charge more)

Lastly, I would offer the same as the last package, but offer to have a studio on sight for anyone to have their portrait taken and put on the website to order prints. Again, I am assuming a fee will cover your time to have someone there to take those photos and the time to put up and take down a studio.

I believe today it is harder than ever to shoot something on speculation and make enough to stay in business. Very few situations today can you do this. What those are, I am not really sure. I just know they are fewer than ever before.