Wednesday, July 27, 2016

Protecting my New Nikon D5 Cameras

Price $39.95
I can tell you a few of the downsides of buying a new camera. First of all when it is new there are changes that will be necessary.

One of the changes I had to go through was not having my EasyCover for the Nikon D5 to protect it for a couple of months. I just got mine last week. I bought two for the two cameras. I even made one different than the other so I could know which camera I was shooting with. This helps when I need to know which camera I am shooting with due to a few things. One may be I set up one for video and the other for stills.

Another reason maybe one is set for studio flash and the other available. There are many reasons you may need to know or remember which camera is which.

One of the cameras has the camouflage and the other is black.

The great thing about getting a new camera is all the improvements and EasyCover also made improvements over the Nikon D4 cover.

At first glance it may look very similar, but they did listen to users and found that the Nikon D4 cover made it difficult to see your buttons. When Nikon made the Nikon D4 they improved it by creating backlight inside the buttons so you could turn on a light to see which is which button, but the EasyCover covered them and you could still push them, just you lost this cool enhancement.

Now you can easily see your buttons on the Nikon D5. There are just a few that they kept covered as you can see above.

Here is a link from EasyCover to help you find the store in your country that you can purchase your Nikon D5 cover.

Now for those of you who shoot with a different camera they make many other covers including lens covers. Check out all their covers for cameras here.

This is one of the best investments anyone can make for their camera. I like to describe it as similar to my Otterbox for my Smartphone. It protects the camera.

Now if I can just get Pocketwizard to update the firmware for the Flex TT5 & TT1 for the Nikon D5 I will be thrilled.

Friday, July 22, 2016

Students first Missions Multimedia Storytelling packages

Nikon D5, Sigma 24-105mm f/4 DG OS HSM Art Lens, ISO 5600, ƒ/5.6, 1/100
What a great week I have had in Kona, Hawaii teaching Sébastien Pannatier and Jessie Toney Multimedia Storytelling.

Dennis Fahringer, pictured above on the left, is the YWAM School of Photography 2 leader that invited me to teach.

Neither student had ever shot video on their cameras. They had never plugged an external microphone into their cameras. They had never done this type of storytelling before.

Now the subjects were not available whenever we needed them and we had to work around their availability and that in itself could have been the deal breaker for these stories, but through persistence they each were able to do formal sit down interviews and capture their stories.

Like everyone who has done a project like this and most of all our very first one we wish we all had more b-roll in the end. I told the students that I have never felt like I had enough b-roll on any project.

Rather than me making you read a lot here are their first projects. Please if you have some words of encouragement as they leave for Rio De Janeiro next week to spend a month there capturing stories around the Olympics let them know by commenting below.


Produced by Jessie Toney


Produced by Sébastien Pannatier

Thursday, July 21, 2016

Start with the Audience

Fujifilm X-E2, FUJINON XF 18-55mm, 
Have you ever seen the acronym WIIFM? It stands for Whats In It For Me. It is the most important part of telling a story. You must understand who the audience is so you can craft a story that will appeal to their desires.

What's In It For Me, are without a doubt, the most important five letters in your business writing, your Web site, maybe even in your business success. Always tell people what's in it for them when they do business with you.

If you try to reach everyone you will likely appeal to no-one.

Nikon D5, Sigma 24-105mm f/4 DG OS HSM Art Lens, ISO 32000, ƒ/9, 1/100
Think of you talking one-on-one with someone in your audience. You need to have them in mind before you even pick your story that you are going to work on.

For there to be a story we have these basic four things:
  1. Subject 
  2. They WANT something
  3. They overcome obstacles
  4. To get it
The audience wants something to. They want to make a good story part of their story. This is often where the audience in a call to action is able to be the helper for the subject to attain their wants.

When I am teaching Missions Multimedia Storytelling Workshop the hardest part of the learning for the student, by the way which is their obstacle, has less to do about learning to use the gear. The real struggle is understanding the storyline.

They must toss out so much because it isn't engaging the audience. 

I get the deer in the headlights look over and over from students when they are showing me their work and I ask why should I care?

They are crafting a story that they are interested in and not one for the audience.

In the hero's journey storytelling model discovered by Joseph Campbell and modified by Chris Vogler there is a meeting of the mentor usually in Act 1. The mentor can be the role of the audience when it comes to the call to action for helping the subject attain their goal.


The keys to a good storyteller is understanding that the Audience, Subject and even you as a storyteller all have a storyline. The key to the successful story is when the Audience, Subject and even you as a storyteller all are able to get what they want.

If your story seems to be stuck check and see which of the storylines [Audience, Subject, Storyteller] is having problems.

One of the key things to evaluate is to constantly be asking how does this help us achieve our WANTS/GOAL. If it doesn't look at cutting it out.

Wednesday, July 20, 2016

Interviewing Techniques for Kona, Hawaii Multimedia Storytellers

Nikon D5, AF-S NIKKOR 28-300mm f/3.5-5.6G ED VR, ISO 280, ƒ/8, 1/100
When I teach students photography, multimedia and/or storytelling I often find myself reflecting over the content.

Nikon D5, AF-S NIKKOR 28-300mm f/3.5-5.6G ED VR, ISO 100, ƒ/5.6, 1/1250
When I was down at South Point on The Big Island of Hawaii you see how all the trees are bent in one direction.

Nikon D5, AF-S NIKKOR 28-300mm f/3.5-5.6G ED VR, ISO 100, ƒ/10, 1/200
When I say all the trees I really mean all the trees are bent from a constant wind. The wind is so constant and good that they put windmills here for wind power.

Nikon D5, AF-S NIKKOR 28-300mm f/3.5-5.6G ED VR, ISO 100, ƒ/7.1, 1/800
While this strong wind is great it will affect the landscape. Well when I teach I am trying really hard to not make so much of an impression it looks like my students are too over powered.

Some of the things we discussed today was interviewing techniques. Now when I taught with my friends Jeff Raymond and James Dockery we compiled a list of tips that we give to the students. Here is that list plus some that I have added this week:

INTERVIEWING TECHNIQUES
  1. Remember the audience doesn't know the question from the interviewer if they are not recorded or on camera. Remind the subject to phrase their answer so that the question is understood in their answer, sometimes by repeating the question.
  2. Write down at least 5 good questions beforehand
    1. Listen to their responses and be ready to deviate from your list
    2. Listen as if you only hear their words, not the question you asked
  3. Ask open-ended questions
    1. Ask questions that CAN'T be answered with a 'yes' or 'no'
  4. Ask "how" and "why" questions
    1. If the person speaks in the abstract, ask "Can you give me an example of that?"
  5. Dig for anecdotes and details
    1. Ask the person to tell you exactly what happened moment by moment
    2. Ask specific details along the way.
  6. Understand them and their story
    1. Try to see the world through their eyes
    2. Remember, it's not your story. Get their story right.
  7. Ask your questions then be quiet. Use silence and don't be afraid of it. No noises to affirm them. Affirm with gestures. Your noises will distract from the sound quality. 
    1. Don't finish their sentences.
    2. Be a good listener. Sit quietly as they wrestle with what they are trying to say.
  8. Coach the person to speak with the passion they feel about the subject.
    1. Can you say that again, but with more feeling?
    2. Remember they may be pretty up tight in front of the camera and need to not just relax but bring the emotion through their voice.
  9. Get the basic details right
    1. Get the spelling of their name (business card, or have them write it down).
  10. Clarify
    1. If something they said didn't make sense, ask for clarification.
    2. Review your footage while you're still overseas, where follow-up is much easier than after you go home.
  11. Get to know your subject before interviewing them. This will not just help them be more relaxed but help you know how to interview them and perhaps help them relax.
  12. You can do the interview at the end of the coverage and not the beginning. I find it is easier to have someone sum up what we saw today than have them talk about a lot of stuff that by the end of the day I never caught on camera. This helps you from lacking in b-roll or images. 
  13. Ask the subject to summarize what you have seen that day. While you may not use all of this, it will help you with a starting place for the narrative.
  14. Mirror them. Keep them going by nodding and smiling.
  15. Keep them on topic. If you have two or more interviews in your package planned, then each person needs to know what they are covering. Sometimes I break it down as to let one person tell me why something happened and the other to explain what they did to make it happen. 
  16. Help them revise their comments. Often i need about 30 to 45 seconds of comments and a person may talk for more than 5 minutes. If I were to edit it later their will not be a good flow. I try and help them summarize what they just said or even edit. When I say edit--I mean cutting content.
  17. Get variety. I like to often record a longer comment and then follow up with them making it really short. Sometimes I use the longer comment. Get another direction just in case. After doing this for a few minutes often this gets their minds engaged and they find a new way to articulate themselves. Allow for this to happen.
Now just remember that you don't need them to tell you everything in words. You will help communicate a good part of what they do also with visuals that you will capture and use as b-roll. You need get them to tell you the things that the visuals don't convey. While you have a visual that shows something happening, it often doesn't help the audience know why.

If you do a good job interviewing then the story will be unique the branches of the story can be like Angel Oak Park on Johns Island near Charleston, South Carolina. Angel Oak is estimated to be 500 years old. The character of the subject will shine through and be who they really are rather than all the wind forcing it's power on the tree.

Nikon D750, AF-S NIKKOR 14-24mm f/2.8G ED, ISO 400, ƒ/8, 1/250

Monday, July 18, 2016

Tips to get better tourist photos

Nikon D5, AF-S NIKKOR 28-300mm f/3.5-5.6G ED VR, ISO 4000, ƒ/5.6, 1/500
While shooting my own photos of the Kilauea Volcano in the Hawaiian Volcano National park you cannot help but notice everyone else taking photos.

Nikon D5, AF-S NIKKOR 28-300mm f/3.5-5.6G ED VR, ISO 100, ƒ/5, 1/500
Here was one family doing this the more traditional way of having a stranger use their camera/smart phone to take the photo for them.

Nikon D5, AF-S NIKKOR 28-300mm f/3.5-5.6G ED VR, ISO 100, ƒ/5. 1/1000
The other thing we saw a lot of was the selfie sticks.

Nikon D5, AF-S NIKKOR 28-300mm f/3.5-5.6G ED VR, ISO 110, ƒ/11, 1/100
Now if you had a real camera you most likely have a lens that will get you and your friends into the photo without a selfie stick.

Nikon D5, AF-S NIKKOR 28-300mm f/3.5-5.6G ED VR, ISO 100, ƒ/5, 1/640
Now I was watching these three ladies in the shade and just a second ago they were taking photos of the volcano way the heck away from them. But they couldn't see their screens in the sun, so they backed up to get the photo.

The downside to this is the only way that people are getting close up shots is to zoom in.

When you zoom in on your smartphone you are not actually zooming, you are cropping in on the image and now shooting a more pixelated version. As long as it looks good on the phone you are OK as long as everyone sees it on a phone, but if they see it on their computer monitor or even large screen TV it will not look so good.

Nikon D5, AF-S NIKKOR 28-300mm f/3.5-5.6G ED VR, ISO 32000, ƒ/3.5, 1/500
While the guy has a camera with a zoom the lady has an auxiliary lens she put onto her photo to help her get closer without cropping. She is basically doing the same thing as a person with an interchangeable lens. She is put another lens on her camera phone to get closer.

Nikon D5, AF-S NIKKOR 28-300mm f/3.5-5.6G ED VR, ISO 65535, ƒ/3.5, 1/160
Many of these camera phones do a great job. This photo here of Akaka falls is with my DROID TURBO by Motorola. It is a 16 megapixel camera that does actually really well.


Now here is the same shot with my Nikon D5.

Nikon D5, AF-S NIKKOR 28-300mm f/3.5-5.6G ED VR, ISO 100, ƒ/5, 1/400
Basically in good sunlight the smartphones do a great job.

Now the tip I would like to share with you is that if you can fill the frame of your smartphone without cropping then most of the latest and greatest smartphone do an excellent job in sunlight. Now if you need to get closer and this is your once in a lifetime trip either buy some auxiliary lenses for your smartphone or buy a camera with a zoom. You will get better photos that you can see on other devices and even make wall prints with excellent results.

Now one finally tip. Even if you have the right gear don't walk backwards to stand in the shade so you can see your monitor. Just take you second hand and create the shade to see your screen.

Wednesday, July 13, 2016

My calling to be a photojournalist

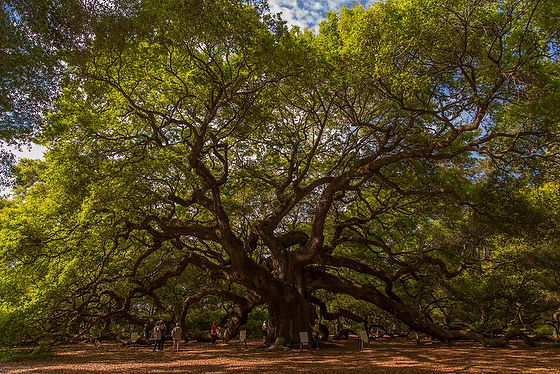
Nikon D2X, Sigma 18-50mm f/2.8 EX, ISO 800, ƒ/2.8, 1/20
Back in high school I felt a call to be a preacher. For those not familiar with this kind of language I will try to explain this a little more for you.
A vocation (from Latin vocātiō, meaning "a call, summons”) is an occupation to which a person is specially drawn or for which she/he is suited, trained, or qualified. Though now often used in non-religious contexts, the meanings of the term originated in Christianity. 
In my Christian tradition we believe that one is responding to God.
After this, I heard the Lord ask, “Is there anyone I can send? Will someone go for us?”
“I’ll go,” I answered. “Send me!” – Isaiah 6:8
While early in my career I would say that when I decided to not to go to seminary after getting my Social Work undergraduate degree that I took a detour, now I would say I was learning how to tell stories.

While working on my master's thesis on Don Rutledge I started to realize I was a preacher. Here is what I wrote in my thesis:
After talking with Don, this writer felt redirected in his call to be a minister who used the camera as a central part of his ministry.  Many who are Christian photojournalists have struggled with the call.  In many ways, the Christian photojournalist is a preacher.  The photojournalist's illustrations are not done with words in the pulpit but with photographs on the printed page.
Today I would change that last line to say with still/motion images used in many mediums to tell the story.

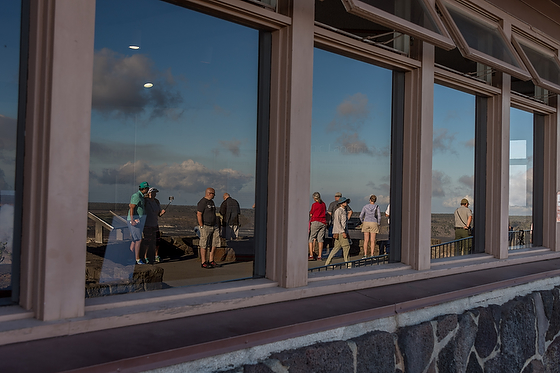
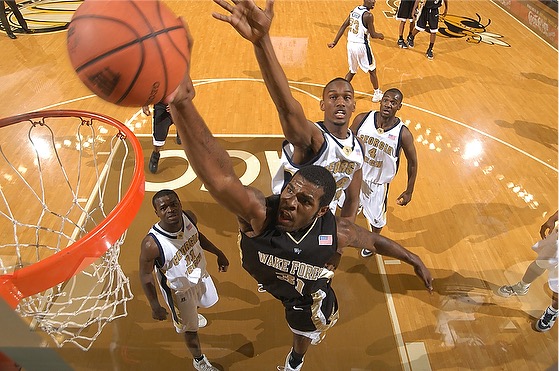
Nikon D2X, Sigma 18-50mm f/2.8 EX, ISO 800, ƒ/2.8, 1/30
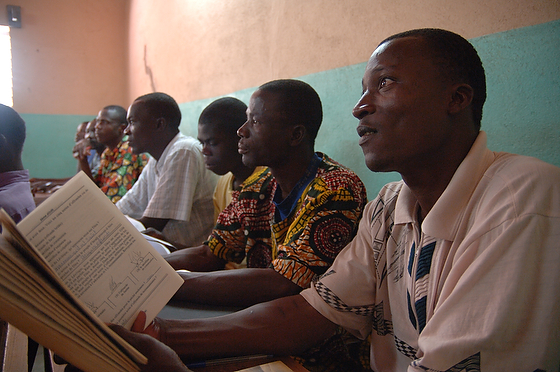
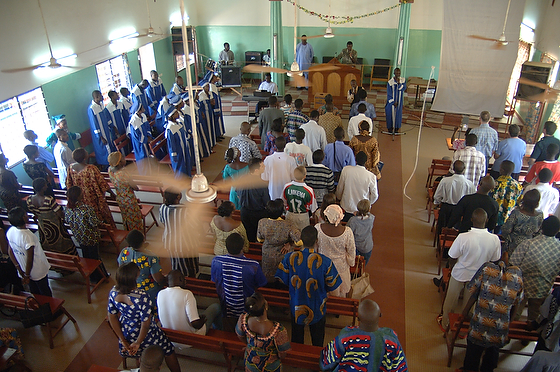
The men in these photos are pastors in Burkina Faso learning how to be effective preachers to lead their congregations.

In 1992 a few of my friends started the Southwestern Photojournalism Seminar in Fort Worth, Texas. To help identify who we were we came up with this sentence:
The Southwestern Photojournalism Conference is the conference for those who believe photojournalism to be a calling and the act of bearing witness to be important.
I believe all photojournalists are responding to a call. Those who agree to the code of ethics of the profession that you can find here are seeking truth and communicating that to their audience.

The hardest part of the code of ethics to me is trying to be sure you are being truthful. This means you must really spend time getting to know the story. You must dig to be sure you are representing the subject accurately and that after seeing your story will feel that you accurately represented them.

While in seminary I was taught how to do an exegesis.
Exegesis includes a wide range of critical disciplines: textual criticism is the investigation into the history and origins of the text, but exegesis may include the study of the historical and cultural backgrounds for the author, the text, and the original audience. Other analysis includes classification of the type of literary genres present in the text, and an analysis of grammatical and syntactical features in the text itself.
Now I went to seminary after working as a photojournalist for more than six years. What I found was that the skill was pretty similar to what a journalist does to be sure they understand a story.

My call story is unique to me, but has a lot of similarities to some of biblical characters like Jacob, Joseph and even Moses.

It is only when you look back through the lives of these biblical characters that you see how God took each thing that often was a struggle that was to help prepare them for their calling.

Moses complained about his voice to God. I was born with Autism. Both of us complained about our struggle to communicate.

What I can tell you is that the camera brought me a great deal of comfort to help navigate this world. I am so thankful that my father who was a Baptist preacher advising me to major in either Social Work or Business in undergraduate and that I would get all of my biblical studies in seminary.

Majoring in Social Work taught me how to listen with my ears and eyes. I learned how to ask questions to get to the bottom of a problem. I also learned about body language and how to read people. This would later help me tremendously with a camera and recognize why certain photos were better at communicating than others.

While my intention of going to seminary to get my masters in communication to return to the church to do photojournalism, it was the required courses in education and theology that I would truly teach me more skills that I use today.

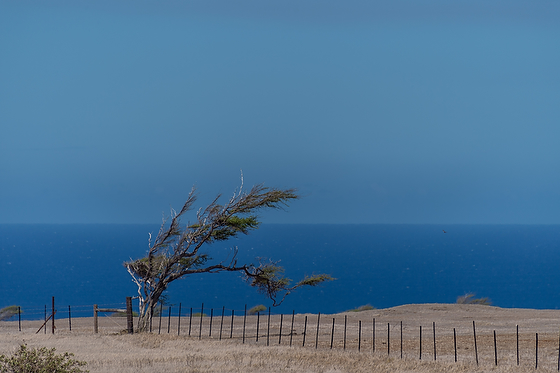
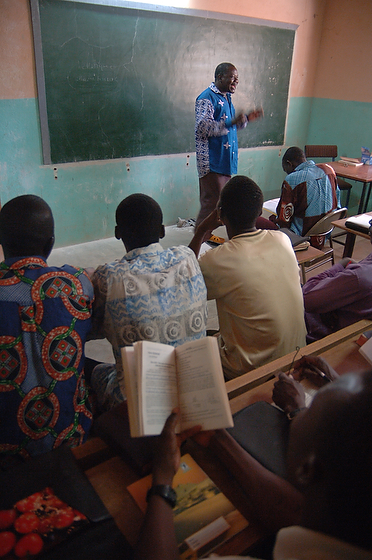
Nikon D2X, Sigma 18-50mm f/2.8 EX, ISO 800, ƒ/2.8, 1/60
Had I not been willing to take a different direction by becoming a photojournalist I might be a pastor today of a congregation. Each week I would prepare a sermon and speak to my congregation. Pastors equip the saints to do the work of the church.

However because I followed the call to use photojournalism as my pulpit the audiences I have reached through different newspapers, magazines, online media and the list goes on is not a few hundred, but literally I am touching the world with the photos I have been privileged by my subjects with their help to capture so that audiences will understand the world in which they live better than they did before they saw these images.

I believe I am equipping the saints through educating them with photos, text/audio and even cinema that helps to deliver stories to them so that they can take actions to make this world even better because they now know more than they knew before.

My favorite thing to do today is to teach others who feel called into this profession of photojournalism/storyteller and equip them to do even more than I was able to do. 

Monday, July 11, 2016

Monday morning devotional for photographers

Nikon D4, Sigma 120-300mm ƒ/2.8 DG OS HSM | S, Sigma TC-2001 2x, ISO 12800, ƒ/5.6, 1/1250
There is a lot of reasons in sports they tell you to keep your eye on the ball. All of them have something in common. There are many distractions in the game.

There have been studies on golfers that showed those who kept their eye on the ball sank more putts than those who didn't.

They discovered that when you look at the ball, then the target, then back to the ball, the brain is desperately trying to process all that information and it can yield unwanted results. By glancing at the target first, then focusing on the ball, you narrow the mental chatter and can get a more accurate shot.

The technique where before you perform an action, you focus your gaze on the salient aspects of your goal—the rim, the catcher’s mitt, the malignant tissue, and so on is called "Quiet Eye."

The quiet-eye technique stimulates the dorsal area of the brain, which regulates focused, goal-directed attention. It may also suppress activity the ventral region, which oversees stimulus-driven attention—the kind that keeps track of a scattered, fluid set of variables.

Not So Easy


Researchers found out that the difference in focus time between a beginner and an expert is as small as a fifth of a second.

Nikon D4, Sigma 24-105mm f/4 DG OS HSM Art Lens, ISO 2500, ƒ/6.3, 1/5000
The moral to the story of "Little Red Riding Hood" is that children must obey their parents and that they must never talk to strangers. Even a very friendly stranger is capable of having bad intentions.

Nikon D5, Sigma 120-300mm ƒ/2.8 DG OS HSM | S, Sigma TC-2001 2x, ISO 10000, ƒ/5.6, 1/400

Red Riding Hood was distracted by the Wolf and we know what happens to her grandmother because of her not listening to her mother and not talking to strangers.

What is my ball?


I continually am asking myself what is the ball that I should be concentrating on today. What is the target that I should be focusing my attention?

I go to scripture to help me discover the ball for today.
Timothy, you belong to God, so keep away from all these evil things. Try your best to please God and to be like him. Be faithful, loving, dependable, and gentle. Fight a good fight for the faith and claim eternal life. God offered it to you when you clearly told about your faith, while so many people listened. – 1 Timothy 6:11-12
We need to do the right thing. We need to be faithful, loving, dependable and gentle. All of those words are verbs. We are to be active.
“I have so much to do that I shall spend the first three hours in prayer.” ― Martin Luther

Martin Luther was incredibly, overwhelmingly busy. His calendar was always full. And yet, in spite of his incredible workload, he found it absolutely necessary to pray. He had to meet with God before he met with the cares of the day. He would not dive into his day without first being refreshed by the Lord. He knew that he couldn’t serve the Lord well without first asking God for help.

I do not know what your ball is for today. I do know that through prayer you will be more likely to find it. Taking the time to stop and spend time being still will let your mind calm itself. You will be able to concentrate and have that "Quiet Eye" moment where you are able to get rid of all those distractions which are keeping you from seeing the ball.

Sunday, July 10, 2016

Less is more for the Storyteller


The more I teach the more I believe you can do a lot more with a lot less.

To be a successful photographer you do need camera gear, but I believe this is something you acquire over time and not something even if you had unlimited funds to buy everything you think you will ever need.

If you are wanting to join me on my multimedia workshop to Honduras this is the basic kit I recommend:
  1. DSLR or Mirrorless camera and lens
    1. Microphone input
    2. Headphone output
  2. Lavalier microphone
  3. Headphones rather than earbuds
  4. Tripod
  5. LCD Viewfinder
  6. Laptop
    1. Adobe Premier or Final Cut
    2. Photo editing software [Adobe Lightroom]
While keeping your gear basic can help you concentrate more on capturing than figuring out how to use all that gear you will be surprised that as a teacher I am focusing on getting you walking rather than running.

Why?


We need to really remember why you are learning how to do multimedia storytelling. You have a person/organization that is wanting to get their message out to an audience to get them involved.

In pure journalism the reporter is keeping their audience informed so that they can choose how they want to get involved. Most of the time this is through their voting, volunteering or even advocacy work they may choose to do.


Audience


Unless you are independently wealthy you cannot be creating stories just for yourself because it is fun. While the subjects that you will cover may want people to get involved, it is really the audience that will determine if they think it is compelling enough to warrant their attention.

An audience is more motivated to take action when something is going to impact them. Again this is why journalist keep the impact of the story on the audience paramount. 

Once you understand who your audience is and what concerns them finding those stories that they might be interested in is far more effective than just finding interesting stories to you. 

The Story


You must really dig deep and know far more about the subject than you will ever tell in a story. We have heard the analogy used over and over, but the telling just the tip of the iceberg story is so important to make it an engaging story.

While facts are super important in a story it is the emotions that will connect and pull the audience into the story much more than facts.

I would say that the facts are the Queen of the story, but it is the emotions that are the King of the story.

There are basically two effective ways to capture the emotions: 1) Visuals & 2) Words.

I believe the most impactful visual is the still photo, because people need to pause on the image to absorb a truly emotional moment. Just as importantly I think it is the audio recording of the human voice that is the most powerful way to communicate emotions as well. In combination you can deliver that one-two-punch.

“I didn't have time to write a short letter, so I wrote a long one instead.”
― Mark Twain


The most powerful stories are well crafted and keep you on the edge of your seat. To do so takes a lot of time. Time to understand the audience, the subject and the skills of storytelling to craft a captivating story.

Come with Gary S. Chapman and myself to Honduras. We have great stories that need to be told and there are many audiences who want to hear those stories.

Wednesday, July 06, 2016

Watch background and lighting ratios in your photos

Nikon D750, Sigma 70-200mm f/2.8 EX DG APO OS HSM, ISO 50, ƒ/7.1, 1/160
When I am shooting something in the studio as simple as this setup is here I test a few things to be sure all the lights are as I want them to be for the final image.

Here is the setup for the photo above:


Watch your backgrounds


One of the things all photographers need to pay attention to is their backgrounds. Now not just compositionally, but just as important is the light ratio as compared to the subject. For the most part you don't want it too bright.


Here your eye goes to the background and not the subject that I want your eye to go to first. Pay attention to this when you are shooting in natural light.

How do you fix this? You can move the subject or move your feet and circle the subject until you find a darker background. You can also add more light to the subject. You can do that with a reflector or a flash for example.


Now another thing I think can help your photos is a backlight shining on the subject to create a rim light.


Here there is a light just slightly behind the subject pointed down. Now here it is a little too bright. But sometimes it can work.

Nikon D4, Nikon 85mm ƒ/1.8G, ISO 50, ƒ/2.8, 1/60
Here are a few more examples of backlighting:

Nikon D3S, AF NIKKOR 85mm f/1.4D, ISO 200, ƒ/2.8, 1/400
Nikon D3, AF NIKKOR 85mm f/1.4D, ISO 200, ƒ/1.4, 1/4000
Now notice in the photos how the background is slightly darker than the subject. With photography you can take control of this with your camera. In all three of the portraits here I use an auxiliary flash off the camera to brighten the subject just enough so that the sunlit areas in the background were not blown out.

Three tips to remember:


  • Watch your background
  • Use Backlight
  • Watch the ratio of light on subject versus the background

Monday, July 04, 2016

Photographers need to understand difference between Captions & Keywords


Looking for a photo? How do you find what you need?

Well the way most people look for photos that they need is to type a few words into a search window and then look at their results.

There are two main fields that are embedded in photographs that are the main places search engines look for matches, those are the Description/Caption and Keyword fields of the Metadata.
Image Metadata is information attached to images files which provide details about the picture. This is commonly used for title, description, keywords and location information. Metadata can be added from the camera the picture was taken with or added by the photographer in their image editing software.
The image above is a screen grab of the metadata of this photograph using the software PhotoMechanic.


If it is just you looking for your images then whatever you want to do to help you jog your memory will help, but that will not work for people who do not know what your image looks like.

Now there are basically two ways people are looking for a photograph. The most searched way would most likely be looking for a photograph to be used that fits a theme. These are generic searches.

To find the photo above they may search for phrases like: "basketball", "men's college basketball", or "college basketball".

Now if those terms are spelled just exactly in the Keywords Metadata field then the odds are pretty good the photo will find it's way to their computer screen.

"Keyword" field is limited to generic terms

Once the person sees your photo they most likely will not open special photo editing software like Adobe PhotoShop, Adobe Lightroom or PhotoMechanic to see what keywords were used for this photo. 

They may have even used a different keyword like "competition" to find the image. Now look at the very top image that shows the fields. A person must take some time and look at an image and think about all the ways the photograph might be used and create a keyword for how someone might look up such a photo. Keywords are separated by commas. The words between the commas are what will determine if the photo matches someone's search.

There is a second way a person will look for a photograph and this is based on something specific like personal names. This is where a generic photo will not work. 

To find the photo above the person might search for "Eric Williams", "Will Bynum" or "Theodis Tarver" because they are writing something about them.

Now when this person downloads the photograph the odds are very high that they will open photo editing software to read the CAPTION. This is because most likely they will use that information with the photograph when they publish it.

"Caption" field contains the specifics about a photo


New field


Now with the plugin LR/INSTAGRAM you can publish your photos to your Instagram account. There is one more field that you can work in while using Lightroom. You have to go to the Metadata and select in the pull-down menu LR/Instagram. Then you can see your fields that you want to use when posting to Instagram. You want to use the #hashtag field for sure and I recommend also using the caption field, which is the same as the IPTC caption field.

#hastags function just like your keywords. If they do why don't you just use the keywords for publishing? Well they are missing the # symbol which social media uses to signal a keyword from the caption information. 

Now if you are really Social Media literate then you will know the difference between the #hashtags and captions. Just remember that:

#hashtag = (keyword - #)

Why do all this work? $$$$$$$$$$ Yes the main reason you would want to do this is so you can make your images findable on the web and then sell them. Two ways your images are sold–Prints for personal use or Licensing an image for use [stock photography].

I use PhotoShelter to do both of these for me. Here are links to learn how you can make money with your images:

Stock Sales on PhotoShelter

Print Sales on PhotoShelter

The key to either one of these is the ability of someone to find your images and they need you to fill in the caption information and the keyword information for them to find your images.

Friday, July 01, 2016

Why Instagram is great for photographers

Instagram is an online mobile photo-sharing, video-sharing, and social networking service that enables its users to take pictures and videos, and share them either publicly or privately on the app, as well as through a variety of other social networking platforms, such as Facebook, Twitter, Tumblr, and Flickr. – Wikipedia

How do you find work?


To get hired you need to find your audience. This is where your potential clients are that you want to show your work.

Many years ago the way photojournalists and photographers got work was by flying to places like New York and making appointments at as many publications or agencies that they could pack together in a few days to a week.

It was common for a person to spend $3,000 to $6,000 on transportation, hotel and miscellaneous expenses to just show their work. Most photographers would have a few books. Each of these books cost were a few hundred dollars or more to produce. You often would drop off your book and hope they would give you a call. So having a few books was important to get your work out there.

Today clients are more likely to just ask you to send them a link to your website. Face to face meetings are more reserved for the actually projects than just seeing people's work.

How do you get their attention today?


Now if you are a writer then Twitter might be the best way to get your work noticed.
Twitter is an online social networking service that enables users to send and read short 140-character messages called "tweets". Registered users can read and post tweets, but those who are unregistered can only read them. – Wikipedia
It is important to note the difference between Twitter and Instagram. Twitter was established to share TEXT and Instagram was setup for PHOTOS/VIDEOS.

While you can post photos on Twitter the audience is expecting mainly text. Instagram requires an image or photo because that is what the audience is expecting.

People like Instagram because it is visual and this is the audience that will appreciate your images.

Your Target Audience uses Instagram


The odds are pretty high that your audience [Potential Customers] uses Instagram. Take a few minutes and go to Instagram.com and type in the search box the names of the companies you want to work with in the future.

Here I searched for Delta Air Lines and before I could finish typing it popped up first.


When you then go to their account they tell you to share your travel pics and use the hashtag #Delta.
Hashtags are a pound sign immediately followed by a keyword. They’re used for categorization on social media.


Instagram is another hotspot for hashtags, and the good news for those who love to extensively tag photos is that there doesn’t seem to be a saturation point.

Interactions are highest on Instagram posts with 11+ hashtags.

Now here is another tip. If you use @Delta then whoever manages the Instagram feed for Delta gets an alert/email that you have tagged them.
This is because @NAME is the account. Only the account holder will get an email, whereas the hashtag is something anyone who follows that hashtag will see.
Believe me there is someone at Delta paying attention to those posts. If they like it they may share your post and if they really like your style they may end up hiring you to shoot material for their Instagram feed and other projects.

Relevance!!!!!!


While I just showed you the backdoor to getting your work in front of potential clients it is important that you use this technique in such a way as to be relevant to your potential client.

If you tag your photo with @NAMEOFBUSINESS be sure the image is something that they would post on their account.


Here is a post where I and tagging Coca-Cola.


Here is a post that I tagged Nescafe.

I also used hashtags for the country and region of the world.

Now just remember that because you are using the correct account name and hashtags to get in front of your potential customers that doesn't mean success. Your images must be compelling and they must think your style of work is worth pursuing.

Now here are some of the Instagram accounts I follow because I think they are relevant and reaching an audience:

I follow many others, but this is a good sample. Most of the successful photographers using Instagram in my opinion marry the text and images so there is a short story.

I have noticed that those who are most successful tend to stay on theme for their Instagram posts. 

Be careful how you evaluate Instagram accounts!!!! Do not base your opinions on what you think about their work alone. I highly recommend taking the time to analyze an account and figure out why they have 40K+ followers. Humans of NY has 5.5 million followers. Now if you are a trained photojournalist you may find fault with the work of some of these Instagram celebrities. Don't discount them. Learn from them and then put your personal touch on your posts using some of their techniques.