Showing posts with label ExpoDisc. Show all posts

Saturday, December 14, 2013

Custom White Balance vs Presets

Custom White Balance using ExpoDisc
Today I shot the Wreaths Across America Day event at Roswell Presbyterian Cemetery.

While shooting this I realized many folks assume those presets for white balance will give good enough results. Well sometimes they do. They will put you in the ballpark for each type of situation.

Auto White Balance 
Now you maybe satisfied with Auto White Balance. The point here is notice it is different than the custom white balance above.

It was raining and they really don't have a rainy preset.

Cloudy Preset
While the cloudy preset is closer I think it is a little too orange.

Daylight Preset
Even the Daylight preset is different.

Shade Preset
I think the Shade Preset is the closest, but still some minor differences.


The latest version of the ExpoDisc 2.0 comes with warming filters. They are slightly a cyan color of different densities to let you pick how much you want to warm up your image. So without them you get a pure 18% grey and by adding these you warm up the photo just a bit.


You just put the warming gel in the front of the ExpoDisc and then take your reading. This way you can keep a consistent warming to all your photos.

So what should you do?  I would advise always doing custom. You can always change it later using Adobe Lightroom if you shot it RAW.

To the left here is the pull down menu that is available to you in Adobe Lightroom if you shot it RAW. These are very similar to the presets on your camera.

Sometimes the perfect custom white balance maybe not your preference in the end.

Just click on the link below to see more of the photos from Wreaths Across America Day at Roswell Presbyterian Cemetery.

Thursday, December 12, 2013

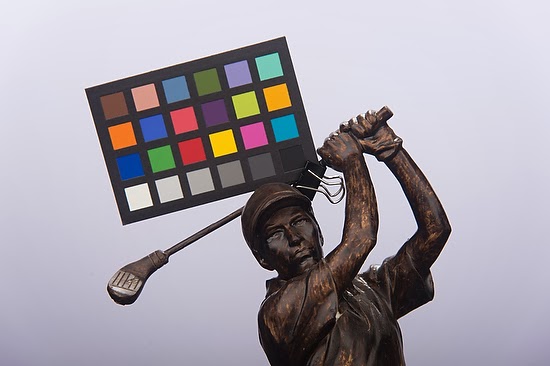
Fuji X E2 vs Nikon F4 with x-rite Mini ColorChecker

Fuji X E2, 18-55mm, ISO 200, ƒ/11 Custom White Balance with ExpoDisc [Click here for Full Resolution]

For this test I used the Munsell Color x-rite Mini ColorChecker chart as the comparison.  They stoped making it, but I still use it.

Closeup of photo above

The top photo is  the Fuji Camera.

Nikon D4, 29-300mm, ISO 200, ƒ/11 Custom White Balance with ExpoDisc [Click here for Full Resolution]
Closeup of photo above


Friday, May 03, 2013

Photographing school plays

Nikon D4, 70-200mm, ISO 11,400, ƒ/5, 1/500
Be Prepared

Here are a few tips to do before you actually start shooting the performance.
  • Arrive Early—You need to have some time prior to the curtain going up.
  • Fast lens and/or high ISO—You need to have the gear that will let you take photos is low light. 
  • Find a good seat—You might think the front row is the best seat, but sometimes the back row is the best. If it is assigned seating, you might want to go before you buy a ticket to the venue. In general I find the seats in the center to give your more opportunities than from the side.
  • Test Shots—Often you can make some test shots to get your exposure correctly set.
  • White Balance—Shooting on Auto White Balance for a theater production is the worst possible time to use this setting. Often the productions use colored lights and this can have your camera correcting which will give your actors funny skin tones. Custom white balance is ideal and second you can try some presets like tungsten to get you close.
White Balance

Having good skin tones is the number one thing that really separates the hobbyist photos from the pros.

My secret weapon is the ExpoDisc. Call my friend Jody Grober at Roberts Imaging 1-800-726-5544 and tell him I sent you. I buy most all my gear from Jody.


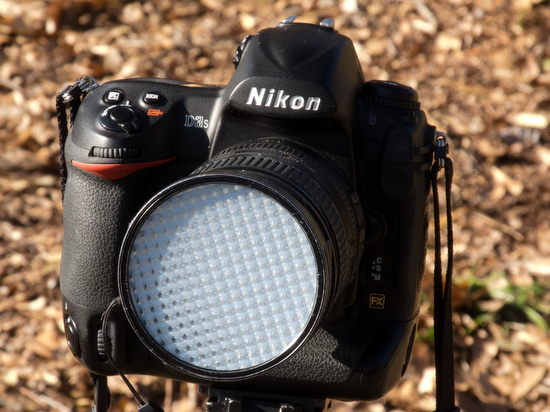
ExposDisc goes in front of the lens and then you use it to get an incident reading rather than a reflective reading of the light.

Notice the direction of the light hitting the subject.  You move to the same position to get the light reading below.

Point the camera toward the direction of the light that is falling on the subject. 
I have found if the subject is facing me and the light is from the side, I face the camera with the ExpoDisc on it so it is pointing towards the camera position.  The chart above is to help you understand the concept, but you can modify it.

One way you can modify it is as long as the light is the same where you are standing, then you could cheat and take a reading from where you are.  The problem that can arise is if they are lit by Window light and the camera position is in the shade then your color balance will be off if you do not take it from the subject's perspective.


Nikon D4, 28-300mm, ISO 3,600, ƒ/5.6, 1/400
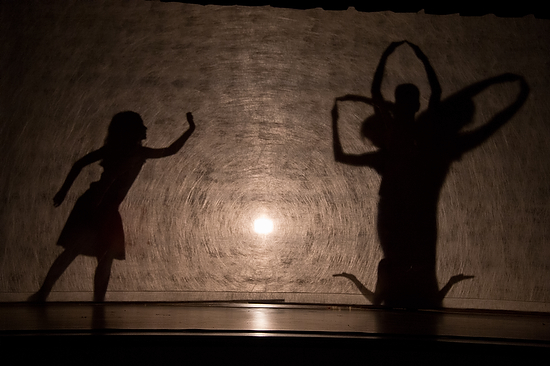
If it is suppose to be a silhouette and you get a photo like mine, then great. However, if you are suppose to see their faces then you need to make some adjustments.


Nikon D4, 28-300mm, ISO 4,500, ƒ/5.6, 1/320
There are a few ways to adjust to get a good exposure on the skin tones. First use spot metering if you camera has it. On the Nikon D4 I can choose selective focus and spot metering. I then have 51 different points I can move the focus/spot metering to take the photo.


Using spot metering and selective focus with the Nikon D4 I have red brackets I move to where I want the focus and exposure to be set by.
Nikon D4, 28-300mm, ISO 12,800, ƒ/5.6, 1/320
Waiting for the light


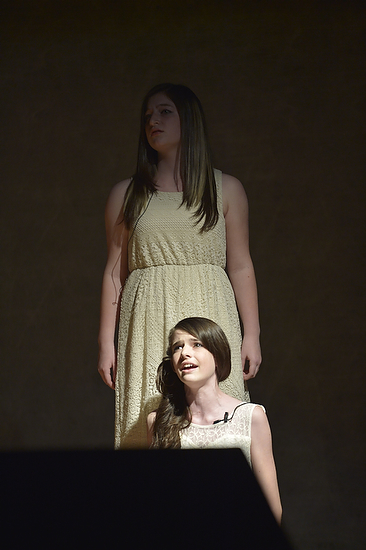
While you are waiting for the peak moments in the scene, you also have to wait for the best light. For example this witch's hat had her face in the shadows most of the time she was on stage., but when she was singing those dramatic high notes she put her head up and eureka you have your shot.


Post Production is critical


Nikon D4, 70-200mm, ISO 1,2500, ƒ/2.8, 1/500
No Flash—That is the rule for stage performances and therefore you are at the mercy of what stage lighting you see. Unless your small town has some incredible endowment for the arts, your lighting on the stage will not look like Broadway or TV shows.  Throughout this production the light value on one person would look great and the other person was blown out or silhouetted. 

This is where taking the photo into either Adobe Lightroom or PhotoShop can help salvage a photo. This is one of the rare moments I am having to fix photos in post production. It isn't because I screwed up, it is because the lighting just isn't even or at least acceptable for photos.


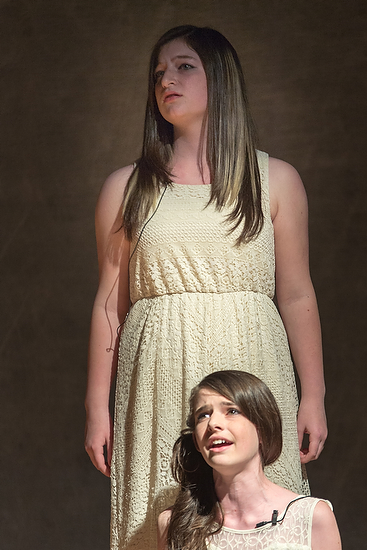
This is the photo before I cropped it or made changes in post production. Notice that the kneeling actress is well exposed and not blown out. As a general rule you can open up the shadows, but do very little with something that is blown out with no detail.


Nikon D4, Sigma 120-300mm ƒ/2.8, ISO 2,500, ƒ/2.8, 1/500


Get Close


Don't shoot the full stage all the time. Vary your images by using really long glass, like a 300mm lens or longer to isolate an actor. The lighting guys do this will spot light to make you look at just one place, but you can do it with lens choice.


Nikon D4, Sigma 120-300mm ƒ/2.8, ISO 2,800, ƒ/2.8, 1/500
Think Marching 


Nikon D4, 28-300mm, ISO 7,200, ƒ/5.6, 1/250
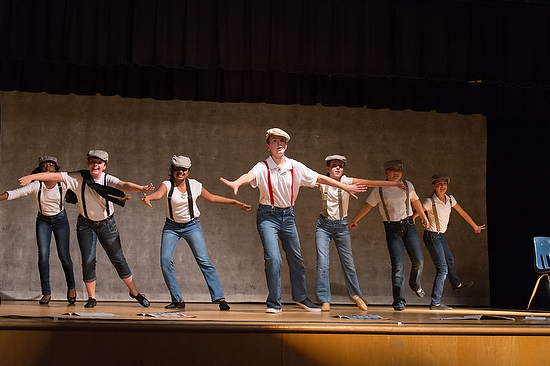
When you see the military marching in formation or see marching bands the photos look great with everyone in sync together.  I usually find that when everyone is in full stride looks better because it creates motion. Closer the legs are together they look like they are standing still, even tho they are moving.


Nikon D4, 28-300mm, ISO 4,000, ƒ/5.6, 1/250
Summarizing


Arrive early, shoot a lot of photos and plan on doing some post production to get quality like I am getting here. You camera phone will not get this quality. Nor will having great gear. What gets this quality is experience. So arrive early to do test shots so you are not shooting your first images of the play when it is live.

Thursday, May 05, 2011

Magnolia Plantation in Charleston, SC

1
Figure 1


We are in Charleston, SC this weekend to celebrate our oldest son graduating from The Citadel.

We had some time to stop by the Magnolia Plantation and Gardens and just wanted to share with you some of my sights while here.

Which ones are your favorite?

2
Figure 2

3
Figure 3
4
Figure 4

5
Figure 5

6
Figure 6

6
Figure 7

7
Figure 8

8
Figure 9

10
Figure 10

11
Figure 11

Tuesday, April 19, 2011

How to capture better color with your camera

glare
Reflections in hood and glass

no glare
Polarizing filter eliminates reflections

“I’ll fix that in post,” is the mantra for so many photographers.  As long as you get the best possible exposure and shoot in the RAW mode of your camera there is a great deal that you can correct in the postproduction.  However, there is one thing that cannot be fully corrected that needs attention before you push that shutter release.

If you shoot RAW rather than JPEG you can change the color temperature much easier and more precisely in the postproduction.  For example when you open the photo in either PhotoShop or Lightroom the RAW image will give you a pull down menu that is similar to the white balance menu built into the camera.  You can pick Auto, tungsten, fluorescent, daylight, flash or custom white balance settings.  If you shoot JPEG these options are not available.

So, the mantra for the RAW shooter of, “I will fix that in post” can be done as far as white balance.  The problem with being able to correct a photo after the fact can give you the false sense of security that everything is fixable in post.

If you miss the exposure even in raw you can adjust the exposure in post, but the results will not be stellar.  Correct exposure will give you more dynamic range in the RAW image than one poorly exposed.

I recommend before you press the shutter to take the photo to do a custom white balance with your camera.  This is where you tell the camera the perfect white balance in that setting. 

expodisc
ExpoDisc is used to get a incident "white balance"

grey card
Grey card is used to get a reflective "white balance"
There are different devices to help you set the custom white balance.  I use the ExpoDisc as my primary device.  This is a device you put on your lens like a filter, stand in the place of the subject and point the lens back towards the direction of either the light or the camera.  This is called an incident reading.

Another great and inexpensive way to set your white balance is a grey card.  This is a 15% grey card that is calibrated to give you what would be the absolute middle tone in your histogram.  You put this where the subject is and filling the frame with nothing but the grey you set your camera to it.  The card is facing the direction of the camera.  This is called a reflective reading.  

If you take time to get a custom white balance you will save this step in postproduction and increase the accuracy of the color in your photos.

no glare2
Polarizing filter diminishes the glare in foliage

glare2
Without the polarizing filter you have glare in foliage
One thing that is not correctable in post is glare.  This is often everywhere in a photo.  The polarizing filter is the best way to correct for this flaw in photos.

Often fishermen wear polarizing sunglasses so they can see below the surface of the water and see the fish.  It helps cut the glare of the light on the surface of the water to see the fish below.

Polarizing sunglasses also help those operating motor vehicles.  The glare from the dashboard, hood and road can be removed with the polarizer.

The polarizing filter fits onto the lens of the camera and after it is attached the photographer rotates the filter while looking through the camera lens is able to decide how much of the glare they want to remove from a scene.  

Besides water and driving conditions glare is everywhere.  The landscape photographer uses the polarizing filter to improve the color of foliage.  Leaves and grass often have glare that a polarizer helps to remove and give a richer color that is not possible to correct in postproduction.

There is one more thing that a polarizer does besides cut glare, but this is a little tricky to grasp.  The polarizer can give you a darker sky, but this depends on the direction you are pointing your camera in relationship to the sun.  Only ½ the sky can be darkened.  Without going to a long explanation, you just need to rotate the filter to see what part of the sky is affected.  If it gets darker then you know it is working and if it doesn’t get darker it isn’t working.

The one thing you want to be careful about when using the polarizer is if the sky in part of the photo is in the area that will darken and some of the sky is in the area that will not darken in the same photo.  

When you listen to the weather report you often hear them talk about humidity.  This is how much water is in the air.  Humidity can be something a polarizer can help with as well.  The water in the air can add to the glare.  Using the polarizer can help in this situation.  The lower the humidity the richer the color because there is less interference between the lens and subject.  Where you will see this the most is in the sky.  In dry climates the sky will almost be black with a polarizer.

I highly recommend you own a polarizer and use it to improve your photos—because postproduction will not fix what it will.