Showing posts with label alienbees. Show all posts

Friday, November 06, 2015

Quick Passports using Nikon D750 and Sigma 24-105mm ƒ/4


Here is the gear I used to create these passport prints
  • Nikon D750
  • Sigma 24-105mm f/4 DG OS HSM Art Lens
  • 5 Alienbees B1600
  • 30º Honeycomb Grid for 7" reflector
  • Paul Buff Beauty Dish – 22-inch diameter, bright white reflector with white sock
  • Paul Buff 86" Extreme Silver PLM™ with On-Axis Speedring Mount
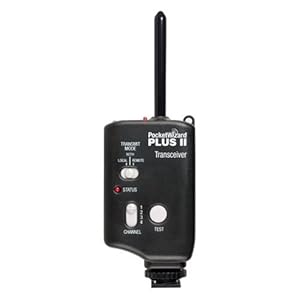
  • Pocketwizard Plus System
  • Epson PictureMate Charm to print
  • Adobe Lightroom CC
Here is the setup for you to see in my basement studio:


The lighting was set to the lowest output on all the flashes to start the process. After I did this the ƒ-stop was ƒ/8 on my face. The background was little brighter. After a few test shots I bumped the background up to just a little under ƒ/11. This gave me a pretty clean white background.


After ingesting the RAW photo I processed and output to a JPEG and this is the one I chose. Here is an birds eye view of the setup.


Go to this website created for US Passports.

http://travel.state.gov/content/passports/en/passports/photos/photo-composition-template.html
All the technical specs are here to help guide you. Notice in the far right lower corner is a "Start Photo Tool." Click on this and you will see this:


Click on the bottom button "Choose Photo" and then find the photo you took. Next after you do that you will see something like this:


Now use the slider to fit the head into the guide. 


Here is how it will look for you, unless you have hair. Well actually hair doesn't matter, keep the face the size of the outline.

Click on crop at the bottom.


Once your photo looks something like this then click on "Save Photo."

Click on photo to see bigger
Import this JPEG into Adobe Lightroom and go to the Print Module as I have done here. I chose the 4x6 print size since I will use the Epson PictureMate to print which prints 4x6 prints.

I dropped the photo into the print by dragging from the lower filmstrip to the working area. 


The in the Add to Package section on the right I adjusted the photo to 2.05 in. I printed the photo a few times till I got the setting just right. You can thank me later for saving you this time.


So the photo now meets the US Passport office guidelines for size.


Also to be sure it prints to the printer you need to select Printer under PrintJob otherwise you create a JPEG file.

Click to see larger
I would also save the print by clicking on "Create Saved Print" as shown by arrow above and then you can just use this as a template next time.

Also I let the color management be handled by the printer since I have already color calibrated the monitor and it looks good to me.

Hit print and then just wait for it to print on the Epson PictureMate Charm. Cost per 1 sheet of 4" x 6" is 27¢. That includes ink and paper.


Now that you have this system I recommend trying it and getting everything down. Maybe save this blog post or print it out. Make notes on the setup and then you are ready for business of shooting passports.

Tuesday, June 05, 2012

Studio strobes or Hot Shoe Flash outside

Walk and Talk with Hot Shoe Flash 

One of my favorite shots to do for organizations is doing what I call the "Walk and Talk." This is where I have two or more people walk next to each other towards me.

I encourage them to barely feel each other next to each other. This keeps them from walking further and further from each other. The closeness to each other also helps communicate they are friends. This is using the body language of touching or almost touching to help communicate their relationship.

Now here are examples I did while teaching in Kona, Hawaii in February this year. These first ones I was showing the students how to use two hot shoe flashes as fill lights.  I have included the assistant carrying the lights for these examples to show you what they are doing as well.

I am talking to the subjects and explaining what I want them to do. No flash went off here.

The photo assistant is carrying a Nikon SB900 and a Nikon SB800.  They are zoomed out to 200mm for the SB900 and 120mm with the SB800.  This helps the light go farther, but also keeps the light mainly on their faces.

Notice the assistant must be pretty close to the subjects for the flash to work properly. In addition to the flashes I am using the RadioPoppers PX system to help relay the infrared signal from the Nikon SU800 on my camera to the flashes.

We switched out the subjects so everyone could experience what it felt like doing this exercise and see it being done.

While showing the class how to use the hot shoe flashes there were a few times where I got ahead of the flashes recycling. By not waiting long enough between flashes (2 sec) the flash wouldn't fire.
Walk and Talk with Studio Strobe

To help everyone see the difference in flashes I also used an AlienBee 1600 being powered by a Vagabond Mini Lithium battery. I was borrowing the Photo Schools radio remotes, but most of the time I now use Pocket Wizard Mini TT1 Transmitter on my Nikon Camera  and have the Pocket Wizard Plus II transceiver on the flashes.


The MiniTT1 will let me shoot at 1/500 sync speed rather than just 1/250.


Now another thing you will notice that is different in these examples is how far away the photo assistant is from the subjects. 


The AlienBee 1600 has the reflector that comes with them on it. So notice that the flash is lighting more of the subjects.  I can change that by just adding a grid, but didn't for these photos.


The flash is set at about 1/8 power. I can almost shoot on motor drive setting for these photos. The reason is the recycle time is so short.


When I shot these photos not a single time did the flash not fire. I think that when it comes to getting the best expression you need to be able to shoot at any moment and not just when your flashes are ready. 


I would highly encourage using the studio strobe over the hot shoe flash for this reason alone.
Just like I did above, I talk to the subjects and do a few test shots before I have them walk towards me.

After we did some tests to get them moving I then had the start over where they are talking to one another.

As you can see it doesn't take long for people to relax and the photos to look pretty natural.  I would have changed one thing in these photos. I would have had the assistant put the light on a light stand and get the light up a little higher to help avoid the glare in the glasses.

This is just to show that the flashes fired every time. 
Now look at the photos where the flashes didn't fire. Besides there faces in the shade the color on their faces isn't as good. I think that using flashes helps you get the best skins tones outside possible.

Go out and try this yourself.

Often when I am flying around the world it is easier to carry the Nikon SB900 and a Nikon SB800 than carrying the AlienBee 1600 and the Vagabond Mini Lithium battery.  So, depending on the situation I find myself in I can still get the photo with either system.