Showing posts with label pocketwizards. Show all posts

Wednesday, February 08, 2017

Ideal lighting for PR Headshots

Nikon D5, Nikon 85mm ƒ/1.8G, ISO 100, ƒ/5.6, 1/200, 4–Alienbees B1600, Pocketwizards to trigger flashes

I am teaching lighting class in Kona, Hawaii with the Youth With A Mission School of Photography class.

This is one of the lighting exercises I do each year. This is teaching the 3:1 Lighting Ratio. I started by showing the class the final photo and then walked them back through how to get this lighting. This is all done with a White Background. See below for the same example but a Black Background.


Here is the setup that I used from above. Now here you can see one of the students later with the setup we were using.


While we have all the lights in generally the places they will be at the end, I turn them all off except the main light. The main light is 45º to the left of the subject and right of the camera as well as closest to the subject. Then I took a light reading and also set the white balance. The aperture was set to ƒ/5.6. Then I took this photo.

Nikon D5, Nikon 85mm ƒ/1.8G, ISO 100, ƒ/5.6, 1/200
Then we turned this light off and turned the fill light on. This is the one closest to the camera. Ideally it would be right behind the camera, but I put it a little off to the side so while operating the camera I am not blocking the light.

I set the light to be one stop less than the main light. The light is set to give me ƒ/4, but I kept the camera set to ƒ/5.6 which meant the photo will be under exposed by one stop.

Here is this photo with the same settings as the main light.


Next we turned both of those lights on and double checked the exposure with a light meter which still was ƒ/5.6. It might have been a 1/10th of a stop brighter, but we kept the camera set to ƒ/5.6.

Here is the combined light photo.


Lastly I turned two more lights on that are just hitting the background and trying to get an even light across it. I made this light just one stop brighter than the main light of ƒ/5.6, so this light was set to ƒ/8.  Here is this photo.


Hope you enjoyed this step-by-step tutorial on how to shoot a 3:1 Lighting Ratio portrait.


This is basically the same exercise using a black background. Now just one thing you need to understand is that the 3:1 lighting ratio allows this photo to be used in so many places. The one thing is where it looks the best in a Newspaper as compared to other lighting which can make those shadows lose all detail and go pitch black. This allows for you to see some modeling of the light to highlight the cheek bones and contours of the face without over doing it and creating a photo with too much contrast.
Nikon D4, Nikon 85mm ƒ/1.8G, ISO 100, ƒ/5, 1/200
Here is the setup


Assignment Description:
3:1 lighting ratio.  This photo is classic lighting.

Items:

Octobox closest to subject
This light is your main light. Get a light reading with just this first. The light should be 45 degrees off the axis of the camera and 45 degrees above the subjects eyes.

Subject
Your subject should have the main light lighting only part of the face and the shadows should be just a little to show the 3:1 ratio.

(D)SLR
Choose the lowest ISO.  Ideally on full-frame camera a lens close to 85mm and on cropped sensor a 50mm. Set your shutter speed to the sync speed for your camera [in your camera manual] or slower. My camera was 1/250 but I shot at a slower speed of 1/200.

Octobox behind the camera
This is your fill light and get just a reading of this 2nd.  Be sure it is 1/2 the power (1 f/stop less) than the main light. After this is done get a 3rd light reading of both lights which will be the setting for the camera. It can be level with the eyes, but you may have to move up with glasses to avoid glare.

First set the main light and here is what that will look like:


Due to using such a large soft box the shadows are not as severe as in our first assignment using the grid light. Some of the light is bouncing off a white wall a few feet to the left of the model or right of the camera position.

Turning the main light off after finding out your setting you need to take a reading and get the fill light to 1 stop less than the main light. The main light was ƒ/4 so the fill light should read ƒ/2.8.

This is what it looks like without the main light on. You can see a little darker but no real shaping of the face as the main light which is 45º to the side.


When you combine them you get the first photo of the model we started with.


The main light is twice as bright as the fill light. So to show this using math we would say the main light has value of 2 and the fill light has the value of 1.

Where both the main and fill light fall on the face is getting the combined value of the 2 + 1 = 3. However in the shadows only the fill light is hitting those and therefore the value is only 1.

So the bright areas get 3 and the shadows 1 giving you a 3:1 lighting ratio.

Now I showed the students how they can add a background light. I put a blue gel over it to show them they can also color the background.


Monday, August 03, 2015

Photography Boot Camp great way to learn photography

Nikon D750, AF-S NIKKOR 28-300mm f/3.5-5.6G ED VR, ISO 5000, ƒ/25, 1/40–off camera flash with Alienbees B1600 powered by Vagabond and triggered using the Pocketwizard system.
Many people will talk about being Baptized by Fire when they took on a new responsibility. This is when you either sink or swim as one might also say about a new job.

There is a new movement in the IT industry called "Coder Boot Camp." 12 Weeks To A 6-Figure Job was a piece first published in December 2014 but continues to get traction.
One fan of these programs is President Obama. In March, the White House announced the TechHire initiative to help communities recognize, and hire, boot camp graduates in order to close the famous "skills gap."
"There's a lot more we can do together to make sure that more Americans benefit from a 21st century economy," Obama said to the nation's mayors. "Folks can get the skills they need in newer, streamlined, faster training programs."
According to a recent report on NPR:
These programs promise, for several thousand dollars, to take people and in a manner of weeks, turn them into job-ready Web developers. 
Virtually unknown just four years ago, today at least 50 of these programs have sprung up around the country and overseas. Collectively, the sector has taken in an estimated $73 million in tuition since 2011. 
And the top programs say they are placing the vast majority of their graduates into jobs earning just under six figures in a rapidly expanding field — filling a need for practical, hands-on skills that traditional college programs, in many cases, don't.
photo by Robin Nelson
Since 2006 I have been part of a Photography 12 week boot camp that does a similar training for those wanting to know photography.

The students in the course I work with each year in Kona, Hawaii do nothing but this one class for 12 weeks. The more I heard about the "Coder Boot Camp" on NPR as I was driving the more I realized this is what we have been doing in that class.

Patrick Murphy-Racey, Sony Artisan Associate, takes a moment to talk with Lily Wang at workshop about the Sony mirrorless camera system. [Nikon D750, AF-S NIKKOR 28-300mm f/3.5-5.6G ED VR, ISO 6400, ƒ/5, 1/250]
I do not think a boot camp replaces a college degree. Career advancement and promotions are based on multiple factors, however, having a bachelor’s degree can be a major factor. Employers often view a college educated employee as someone who is motivated to learn, able to meet deadlines and has problem solving and communication skills. Many management and administrative positions require a bachelor’s or master’s degree.

What a boot camp does do that college degree doesn't always do is train you in those very practical skills you need each day in the profession.

Nikon D4, AF-S NIKKOR 14-24mm f/2.8G ED, ISO 12800, ƒ/8, 1/100
The multimedia workshops that I am now teaching have no tests and grading. No one cares in the industry if you graduated Magna Cum Laude, they want to see your portfolio. The boot camp experience is where you will spend a great deal of time hands on and producing just like you would do on a real job.

The difference between the job and the boot camp is the coaching and teaching that comes along with the instructors. They will review your work and help guide you to help you produce a portfolio that without the instruction would have taken you a much longer time to do on your own.

Photography has very few Boot Camp Programs where in a 12 week period you get the practical skills to start working as a professional. The School of Photography program that Dennis Fahringer runs in Kona, Hawaii with University of the Nations is the only one that I know of. It is designed for Christians who want to use photography in ministry/missions to impact the world.

There are shorter workshops that will teach a specific skill like I do with my Multimedia Workshop or Lighting Workshops where you learn in a short period of time a skill.

+/- Photography Boot Camp
  • The most important key element about attending a bootcamp was a COMMITMENT to and PASSION for learning the technology. You will get a great deal out of the program if you bring an insatiable desire for knowledge. 
  • You realize that it is a portfolio that will get your hired and not how many classes you have taken.
  • You take on all the projects with the desire to redo any part of the process until it is portfolio worthy.
  • If you are not carrying your camera around most of the time this is good clue you might not benefit from this program.
  • If you find that spending 8+ hours a day doing nothing but photography to be too much then you need to avoid this.
  • If you have trouble dealing with criticism this isn't the profession for you. While no one enjoys criticism the person with a passion realizes they need to get better and welcome the criticism rather than recoil from it.
I am a lifelong learner and realize that every few years I must take a deep dive into something new that I need to learn. This might be a class to learn a new software or going to a workshop to learn about a new piece of gear that has just been introduced. Whatever the case, I realized long ago that I will never know all there is to know about photography and that I can always learn something new.

I have a one week bootcamp in Multimedia Narrative Storytelling in Mexico with Coffee Growers. Click here to learn more.


Friday, June 08, 2012

Versatile lighting setup for groups and head shots

This is a lighting setup I used for an awards dinner last night. A little over 100 awards given on stage in just a few minutes. After they got their award they walked off the stage and I took their photo.  I was averaging about 3 groups a minute with 2 shots each.  We were moving.

So this is where speed was very important.

Items I used for the shoot:

When I set this up I used light stands that go to about 8 feet tall. I would suggest 10 foot light stands if I were to do this again. I set the lights 45º to either side of the camera and as I high as the light stands would go.

The reasoning is that I had no time to have people sit down and pose them. They would all be standing.  I wanted the shadows to go down behind the and not up on the screen. I kept everyone about 2' to 3' away from the background to help the shadows to fall down or wide.

I wanted to shoot at f/8 to be sure if I ended up with two rows everyone was in focus. I didn't need much more depth a field.

I shot at ISO 200 and 1/8th power on the monobloc lights.

Results for the Awards Photos


The reason I didn't use umbrellas or soft boxes was the space issues.

While you are here photos

Now the primary reason I am hired is to get these photos which are then sent to those in the photos for them to use in their own newsletters to promote their winning of the awards. However, once you are there they often want some other photos. The most common is head shots of their staff.

Since we didn't have the luxury of time and space to use another lighting setup I shot the staff head shots using this lighting setup. 

Results for quick head shots


The client is satisfied because the photos work well for their uses.

More than photos

If all I were doing was just taking these photos it would be one kind of a job, but they need names of everyone. So I was able to shoot and identify all the people in the photos. Think about pulling this off.

How would you shoot and identify all the people in the photos?

I then print out contact sheets with the photos and the names under each photo. The text is also in the metadata of each photo, so if they can search for photos by names or open the file in software that reads metadata (PhotoShop) and read the caption.

Since the photos all have identification embedded, then the client can easily just drag and drop these photos into a database and easily pull photos in the future.

Keep in mind when you do a job that there might be a better way to do any individual part of the package. However, you must take into consideration all the aspects and how they impact one another to reach the goal for the client. 

Tuesday, June 05, 2012

Studio strobes or Hot Shoe Flash outside

Walk and Talk with Hot Shoe Flash 

One of my favorite shots to do for organizations is doing what I call the "Walk and Talk." This is where I have two or more people walk next to each other towards me.

I encourage them to barely feel each other next to each other. This keeps them from walking further and further from each other. The closeness to each other also helps communicate they are friends. This is using the body language of touching or almost touching to help communicate their relationship.

Now here are examples I did while teaching in Kona, Hawaii in February this year. These first ones I was showing the students how to use two hot shoe flashes as fill lights.  I have included the assistant carrying the lights for these examples to show you what they are doing as well.

I am talking to the subjects and explaining what I want them to do. No flash went off here.

The photo assistant is carrying a Nikon SB900 and a Nikon SB800.  They are zoomed out to 200mm for the SB900 and 120mm with the SB800.  This helps the light go farther, but also keeps the light mainly on their faces.

Notice the assistant must be pretty close to the subjects for the flash to work properly. In addition to the flashes I am using the RadioPoppers PX system to help relay the infrared signal from the Nikon SU800 on my camera to the flashes.

We switched out the subjects so everyone could experience what it felt like doing this exercise and see it being done.

While showing the class how to use the hot shoe flashes there were a few times where I got ahead of the flashes recycling. By not waiting long enough between flashes (2 sec) the flash wouldn't fire.
Walk and Talk with Studio Strobe

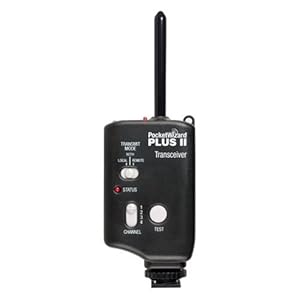
To help everyone see the difference in flashes I also used an AlienBee 1600 being powered by a Vagabond Mini Lithium battery. I was borrowing the Photo Schools radio remotes, but most of the time I now use Pocket Wizard Mini TT1 Transmitter on my Nikon Camera  and have the Pocket Wizard Plus II transceiver on the flashes.


The MiniTT1 will let me shoot at 1/500 sync speed rather than just 1/250.


Now another thing you will notice that is different in these examples is how far away the photo assistant is from the subjects. 


The AlienBee 1600 has the reflector that comes with them on it. So notice that the flash is lighting more of the subjects.  I can change that by just adding a grid, but didn't for these photos.


The flash is set at about 1/8 power. I can almost shoot on motor drive setting for these photos. The reason is the recycle time is so short.


When I shot these photos not a single time did the flash not fire. I think that when it comes to getting the best expression you need to be able to shoot at any moment and not just when your flashes are ready. 


I would highly encourage using the studio strobe over the hot shoe flash for this reason alone.
Just like I did above, I talk to the subjects and do a few test shots before I have them walk towards me.

After we did some tests to get them moving I then had the start over where they are talking to one another.

As you can see it doesn't take long for people to relax and the photos to look pretty natural.  I would have changed one thing in these photos. I would have had the assistant put the light on a light stand and get the light up a little higher to help avoid the glare in the glasses.

This is just to show that the flashes fired every time. 
Now look at the photos where the flashes didn't fire. Besides there faces in the shade the color on their faces isn't as good. I think that using flashes helps you get the best skins tones outside possible.

Go out and try this yourself.

Often when I am flying around the world it is easier to carry the Nikon SB900 and a Nikon SB800 than carrying the AlienBee 1600 and the Vagabond Mini Lithium battery.  So, depending on the situation I find myself in I can still get the photo with either system.