Tuesday, June 11, 2013

Your camera choice does make a difference

Nikon P7000 ISO 3200, ƒ/4, 1/65
While on our cruise through the Caribbean we did some ice skating on the cruise ship. The first time we went I took my point and shoot and got some photos.

As you can see in the photo above I got a decent photo of my lovely wife Dorie.  I didn't want to use flash so you could see the ice rink.

I had a lot of blurry photos due to I could not get above 3200 without changing the resolution on the camera.

Nikon D4, 28-300mm, ISO 12,800, ƒ/5, 1/60
The next time some of the family went ice skating again I took my Nikon D4 and shot some photos as well.

There are a couple of things I think worth comparing. First of all the Nikon D4 @ ISO 12,800 looks better than the Nikon P7000 @ ISO 3200.

This is the reason I own a Nikon D4.  The sensor on the Nikon P7000 is CCD and the Nikon D4 is CMOS. The CCD has more of an electrical charge going that actually creates a noise as compared to the CMOS.


The size of the actual sensor also impacts the quality of the image. I am talking about the physical size and not the megapixels. The Nikon P7000 has a 14.9mm width CCD sensor size. The Nikon D4 has a 36mm width CMOS sensor.

If the megapixels were equal just having more space on a sensor helps spread out the sensors and cuts down on the noise created.  Just think of how your AM radio is impacted when you drive near power lines and you hear a buzz.  This is the major advantage for right now between the larger sensor and the smaller.  The larger the sensor the less noise.

CCD stands for Charged Coupling Devices.  They have been around a long time. CMOS stands for Complimentary Metal Oxide Semiconductor.  They are a newer technology.

The biggest difference is CMOS sensors are already superior to CCD sensors in terms of power consumption. You get a much longer battery life out of a CMOS camera, which means you can take more pictures.

How many megapixels do you need?

Now let me try and clear up this megapixel dilemma.

My first digital camera was a 6 megapixel CCD sensor camera. I made 16 x 20 prints that are still hanging in my home. These were shot with studio lights giving me the best quality and I like the quality of the prints.

The general rule of thumb is this, if you are not making prints bigger than 16 x 20 then any 8 megapixel camera or more will work just fine.

If you like to make bigger prints or you tend to need to crop your photos then getting more megapixels will benefit you.  However, for most people who are posting their photos primarily on social media websites, most any camera will do. This is why so many people are using their camera phones today instead of carrying another camera. Most of the latest phones have 8 megapixel cameras and that will work well for most of them.

For the Geek

Now for those of you who like to talk about how many millimeters your lens will resolve then you can go and get those specs on any camera you might want to buy here at http://www.dxomark.com/.

As you can see there is a big difference in the specs on these two cameras. I hope so, because the Nikon D4 sells for $6,000 and the Nikon P7000 sold for $500.


Nikon paid attention to these scores and improved them and the most recent version of the Nikon P7000 is the P7700.


Summary

If you just do general shooting then buying the high end camera is just overkill.  However, if you like shooting in low light inside then you just might need to consider something like the Nikon D4 to capture those images.

Your camera choice does make a difference in the quality of the image, but it is the photographer who makes a difference as to if the images are truly captivating to the audience.

Sunday, June 09, 2013

Vacation Planning Guide for Photography

Nikon D4, 28-300mm, ISO 100, ƒ/5.6, 1/800,  Off camera fill-flash using the Nikon SB-900 and SB800.  The Flash is on the Pocketwizard TT5 and being triggered by the Mini TT1 on the Camera with the AC3 to control the output of the flash. Flash is +2 EV and the camera is 0 EV.
I took the past week off for a family cruise of the Caribbean on the Royal Caribbean Freedom of the Seas with my parents, sisters and all of our families.  There were fourteen of us each evening at the evening meal.

I realized from watching so many folks traveling with cameras and from my own experiences I think you need a basic checklist of what you should bring for your vacation trip.

I am going to address two types of camera kits that you might want to use for your next vacation. The two kits are the Point and shoot camera and the DSLR.

Nikon P7000, ISO 1600, ƒ/3.2, 1/160

Point and Shoot Camera kit

First let me just list what should be included in your carryon bags for this kit.

• Camera
• 2 Batteries
• Battery Charger
• 2 Memory cards
• Lens cloth which can double for your gray card
• Bag or a plan for carrying what you need

The camera is obvious, but many people travel with just one battery. I recommend always having at least one spare battery always charged with you. At the end of each day, I recommend going ahead and charging the battery you used that day and if necessary your backup if you used it.  Too many people miss opportunities due to dead battery on the trip of their lifetime.

Today I would recommend carrying large capacity cards. Check with your camera manual and get the largest capacity possible.  Today many of these cameras will take a 64-gig card. Sometimes it may make more sense for the price to buy a few 16-gig cards than one 64-gig card.  If you take enough memory cards you can eliminate the need of carrying a computer or something like a portable hard drive designed to download memory cards.

Carrying a gray cloth that is designed to clean your lens can help you keep that lens clean and help for white balancing when you need to do so. Please remember to check your lens each day periodically.  Fingerprint on the lens will deteriorate the quality of the images.

Nikon P7000, ISO 100, ƒ/3.5, 1/1250

Which point and shoot should you buy if you don’t have one?

I recommend getting something with a decent zoom on it so you can get those images of things far away. I think most people will be able to find a camera in the $200 - $500 range that gives you a great deal of flexibility that can fit in you pocket.

Here are a few models that I would consider:

Canon PowerShot SX280 HS
• Canon PowerShot SX280 HS – It has a 20X zoom, which is equivalent to the DSLR 25 – 500mm. It is a 12.1 megapixel CMOS sensor. ISO 80-6400
• Nikon Coolpix L610 – It has a 14X zoom which is equivalent to the DSLR 25-350mm. It is a 16-megapixel CMOS sensor. ISO 125-3200
• LUMIX ZS25: Compact Long Zoom Camera – It has a 20X zoom, which is equivalent to the DSLR 24 – 480mm. It is a 16-megapixel CMOS sensor. ISO 100-6400


There is another Point and Shoot camera model in between the small pocket camera and the larger DSLR. I call these Bridge Cameras.  They are cameras with incredible zooms that make them a little larger and look like their big brother the DSLR, except you cannot change the lens.  However, with the zoom on these who would ever need another lens.

Here are just three Bridge Cameras you should seriously consider before sinking lots of cash into a DSLR.

Nikon Coolpix P520
• Nikon Coolpix P520 – It has a 42X zoom, which is equivalent to the DSLR 24-1000mm. It is an 18.1 megapixel CMOS sensor. ISO 80-3200 [H2 pushed to ISO 12,800]
• Canon PowerShot SX50 HS – It has a 50X zoom, which is equivalent to the DSLR 24-1200mm. It is a 12.1 megapixel CMOS sensor. ISO 80-6400
• LUMIX LZ30: Long Zoom DSLR Alternative Bridge Camera – It has a 35X zoom, which is equivalent to the DSLR 25 – 875mm. It is a 16.1 megapixel CMOS sensor. ISO 100-6400


Nikon D4, 28-300mm, ISO 250, ƒ/8, 1/500

DSLR Camera Kit

Plan to carry this on with you for security reasons.

• Camera
• Off camera flash
• Zoom or fixed lenses to cover 24 – 300mm recommended
• 2 Batteries
• Battery Charger
• 2 Memory cards
• Lens cloth which can double for your gray card
• Bag or a plan for carrying what you need

The basic difference for the hobbyist and the professional is the need for backup on everything for the pro.  My comments for each are the same as before with the Point and Shoot cameras.

Plan for the plane’s you will fly. If you have one of those really small jets or propeller plans you can only put a very small bag on board with you. If you are carrying a lot of gear I recommend suing the ThinkTank roller bags and check them at the door of the gate.  They will give them back to you as you get off the plane. It is a little safer than checking the bag where it can get lost.

If flying internationally you really do need to watch the weight. This is where a camera vest can pay off because you can put gear in it and it doesn’t count as baggage.  Cargo paints will work great for a lens or two.

My two sisters gave me a surprise kiss during our family photos. Nikon D4, 28-300mm, ISO 12,800 ƒ/8, 1/30 with Nikon SB900 on camera with 0 EV compensation and slow-sync.
Here is a family photo that I setup and asked a person to push the button for us.

Nikon D4, 28-300mm, ISO 12,800, ƒ/8, 1/125 with SB900 direct flash for fill on slow-sync.


Thursday, May 30, 2013

Photojournalists covering disaster need to know their role


Moore Oklahoma Disaster Relief Coverage

I find many people who have trouble covering disasters or helping with them due to being overwhelmed emotionally. While seeing horrific tragedy can affect you if it consumes you it isn't healthy. It is healthy to have a heart and be moved by the situation, but when it imobilizes you is when it is a problem.

When you are unsure of your role is when you are more prone to being an emotional wreck and not very useful.

The people of Moore Oklahoma are some of the most resilient people I have ever met. One of the reasons for this is their understanding of their roles in disasters.

You can ask any resident their plan in case of a tornado and they can tell you their A, B or even a C plan they have in place. Most of them will first tell you if they have a place to go for shelter below ground or in a safe room above ground.

The next plan beside seeking shelter is to get out of the way. Most of them with this plan will just get in cars and drive away from the area.


Once the tornado has hit everyone jumps into recovery mode. What is interesting here is many people realize they are better off doing what they do best rather than doing just anything.

After digging out of their own homes, many will go back to work, because what they do as a job is helpful. Many who worked in the restaurants would go back helping feed those who are the first responders and the victims of the tornado.

You see most of these residents understand how they are most helpful for recovery efforts.


The Photojournalist's role

While I could have gone to Moore, Oklahoma with a team to help clean up, I am much more useful telling the story. You see when I do my job well as a photojournalist I am helping get the word out.

There are three basic things I see as my role as a visual storyteller.

First, I need to help people know what happened. Now besides taking pictures showing the damage, I need to help tell the personal stories of the victims of the tornado. This first piece of the puzzle will help engage my audience.

When I capture the emotional impact the tornado is having on the community, it is time to move onto step two.


Second, I want to show what is happening right now. This is where I am showing the immediate first responders helping the community. This could be in the moments right after the damage while they are digging through the rubble to find survivors or it can be even days to weeks later where I am showing teams helping clean up.


I enjoyed showing all the teams helping clean up. I was there to show Chick-fil-A going around helping those home owners and clean up teams by giving them a hot sandwich.

Many of the local Chick-fil-A franchise guys all realized they served their community best by doing what they do best--making chicken sandwiches.

As a photojournalist I have to remember what I do best. Visual storytelling by me is helping the subjects connect with the audience who can potentially help. This is where I move on to the last part.


Third, I need to help my audience know how they can get involved. You can here the lady sharing how it is helpful for teams to come and help them put their community back together and for those who cannot come even prayer can make a difference.

Without giving people a way to respond can often cause problems. Most news media outlets coverage will tell their audience they can give to the Red Cross for example. I encourage you to consider going with a team as well and for everyone to pray for the people.

Monday, May 27, 2013

3.5 Easy Slide Show solutions for Mac and PC


The last time I wrote about creating slide shows Adobe Flash based systems were supported everywhere on the web. After Apple decided to not support Flash on their iPads, iPhone or iTouch things changed.

All the slide shows I produced early on will not work on the Apple mobile devices as they were created up till not that long ago.

Today I do use Final Cut Pro X primarily when editing video and mixing in still images. I have also used Adobe Premier prior to Final Cut doing the same thing.

While I could use Final Cut Pro X and create slide shows these solutions are much simpler and faster in my opinion.  I can even produce most of what I want and export them into Final Cut Pro X if I like.

1. Soundslides Solution for both Mac and PC

The latest version of Soundslides (1.9.5) has JQuery HTML5 built into it. The beauty of the Soundslides solution is that the project will play back using Flash when available and use the HTML5 version as a fallback. This ensures the user experience is the best it can be.

Here is an example I recommend trying on your desktop/laptop and then if you have a Apple Mobile device try it there as well. By the way I had saved the original file [2008] so I was able to update the output for HTML5. 


The best part of the Soundslides solution is that it is cross platform.

You may find out as I did that some servers do not like the way Soundslides is talking to the device to determine what it is before giving it a flash or html5 version. The way licenses work they cannot create an html5 version only since it will not work on all browsers.


This is when you can choose to use Soundslides Video converting service. The downside is you have to upload your file and then wait for them to send you a link to download it. Your project goes into a Que and if you are on a deadline this might not work.

As far as simplicity to use and if your office has a mix of PCs and Macs this is a great software that is fairly easy to use. Having everyone using a similar software means you can easily train everyone.


2. For the Mac


My favorite Slide Show software for the Mac that creates movie files is FotoMagico.  The cost of the software is $99. One thing they offer that I don't know any other software offering is One-to-One Coaching.  Get up to speed with FotoMagico! Get tips and tricks from our tech support pros. Be more productive, and get your work done faster. Arrange a one-to-one online session with desktop sharing for $99 per session.

When you are ready to output the show FotoMagico has easy choices like YouTube, Apple Devices and just about any other output including 4K Cinema Projection.


3. For the PC


For a long time before I switched to using Mac exclusively I was using ProShow Gold.  I found going from ProShow Gold to FotoMagico seemless and believe they work very similar.


As you can see from the screen grabs they look very similar.  The outputs are similar to FotoMagico. You can create DVD, Blu-ray, Facebook, Youtube and more outputs.


My suggestion is to output to H.264 format since this is a standard for video compression, and is currently one of the most commonly used formats for the recording, compression, and distribution of high definition video.

All of these solutions make it very easy to combine your still images with audio. You can create a voice over, use music and even blend with video. The learning curve on these software packages is much easier than using Adobe Premier or Final Cut Pro X.


3.5 DigiCraft Plugin Solution

If you are looking for a plugin to use with Adobe Lightroom to create a slide show gallery try DigiCrafts software.  It was created primarily for photographers to create portfolio package to play on Apple devices.  I have used it when I just need a click through package.


I used this software to create small galleries of my work for my blog and website. You can click on the categories above. Here is the "education gallery" I created using DigiCrafts.

Photographers: Diskwarrior and Reimage Keeps Your PC or Mac Like New


I want to help you fix all those quirks that eventually will happen with any computer.  Here are my two recommendations as must haves for your computer.

Both of these software solutions are helping you with your operating system. 

For the PC

Reimage is a unique repair service fixes your Windows Operating System - it reverses the damage already done with a full database of replacement files. Only software of its kind. It sells for $69.95 and for $30 more you can install it on three computers.


This chart does a great job of showing you what it can do. There are two things on that chart that make a huge difference: Repair at any time and private. I recommend this before taking your computer to a repair shop. The cost of the software will be less than the shop and if it works you saved yourself the trip.

If it is a hardware problem it will let you know and well you can replace something or then take it to a shop.

Some of the problems I was having with Windows 7 was the print spooler was not launching, I could not empty the trash can and when I clicked on the control panel under start I got error messages. Ran reimage and now it is as good as new.

Now I use VMware Fusion 5, which lets me run PC programs on my MacBook Pro. The only program I use this for is Quicken Home & Business to help with book keeping for my business.

The Quicken Home & Business sells for $99.  Great program for invoicing and keeping up with all my expenses.

VMWare Fusion 5 sells for $49.99.

Reimage needs a good internet connection because once it finds the problems it will download all the fixes and replace those registry and other files that have been corrupted to the factory settings.


For the Mac

DiskWarrior is the software I use to help improve the performance of my MacBook. It sells for $99. 

You will launch the program from either a DVD or from an external drive when you turn on your computer. I have it on an external drive and when I turn on my MacBook Pro I just hold down the "option" key and it gives me the option to start the computer from my external drive that is a complete copy of my laptops hard drive.

The reason for DiskWarrior to launch remotely is this is the only way for you to repair problems with the operating system at the root.
  • DiskWarrior recovers your files including your photos, music and videos.
  • DiskWarrior cures those cryptic errors reported by Disk Utility.
  • DiskWarrior uses a different approach to disk directory repair than other programs.
  • DiskWarrior is the only product that finds all of your data.
  • DiskWarrior is the highest rated and wins more awards.
There are two other programs on your mac that you can also use: Recovery and Disk Utility.

Recovery
 
OS X Lion or OS X Mountain Lion includes a built in set of utilities in the Recovery System. Restart your Mac and hold down the Command key and the R key (Command-R), and keep holding them until the Apple icon appears, indicating that your Mac is starting up. After the Recovery System is finished starting up, you should see a desktop with a OS X menu bar and a "Mac OS X Utilities" application window. Note: If you see a login window or your own desktop and icons, it is possible that you didn't hold Command-R early enough. Restart and try again.

In order to reinstall OS X Lion or OS X Mountain Lion, you will need to be connected to an Ethernet or Wi-Fi network. The Wi-Fi menu item is in the upper-right corner of the screen. Click the icon to display all available Wi-Fi networks. Click your preferred network name and, if needed, enter a username and/or password.

Disk Utility

You can access it the same way by restart your Mac and hold down the Command key and the R key (Command-R), and keep holding them until the Apple icon appears. This will let you choose the Disk Utility.

Another way is to go to Applications folder>Utilities and select the Disk Utility.  Click on first aid and choose disk repair. This will improve performance as well.

The advantage of DiskWarrior is it goes deeper by letting you clean the hard drive at the lowest level.

Saturday, May 25, 2013

Shooting Workflow for the Novice Photographer


These are the steps I went through yesterday teaching the camp photographers for WinShape Camps. These were photographers with all levels of skill. We wanted all of them to have a good starting point.

Step One: Quality set to highest

Set your camera to the biggest and best quality. For most of the people and the cameras they had setting the camera to JPEG Fine on the Nikon cameras and JPEG "L" on the Canon cameras. The reason for this choice is if there is a great shot they want to use later for poster, then it needs to be the best quality.  If you can edit RAW images I recommend this over the JPEG setting. You can go back and fix white balance if you screw that up when you shoot RAW.

You cannot up size a photo without the possibility of pixelation.

Step Two: Use Auto ISO

AUTO ISO

Since the quality of the ISO really has little impact on the quality of the image AS COMPARED to the major quality shift with film, I have my camera normally set to AUTO ISO most of the time.

I will go in to the menu and change this AUTO ISO settings.


Nikon D3S menu ISO settings
Nikon D3S ISO settings allow you not just to set the ISO you can choose AUTO ISO. I use this most of the time. You choose the range by choosing the low and maximum ISO. You also can choose the minimum ISO preference.
This AUTO ISO setting isn't taking creativity away, but rather I have set the tolerances that I would have been having to stop and think about to do anyway. This lets me get the moment sharp and in focus, which is critical in sports.

What is the take away?

Before the digital camera, to use ISO in a creative way meant to change film stock. You also could not shoot AUTO ISO. Due to this no longer being a hindrance I now see the ISO setting the way I see aperture and shutter-speed.  It is another creative tool giving me more options to get photos that in the past were not possible.

Step Three: White Balance 

Before taking any photos of a new situation we make a custom white balance to get the best possible skin tones.

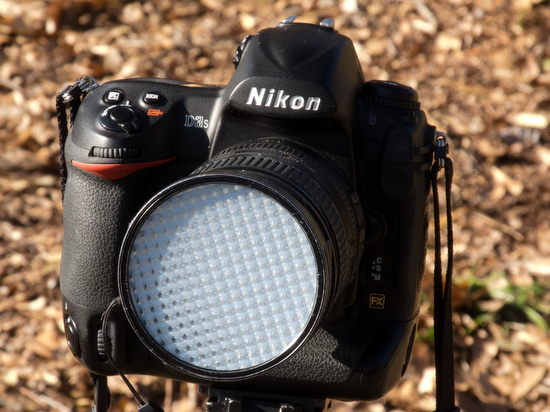
My favorite way for getting a custom white balance is using my ExpoDisc.


ExposDisc goes in front of the lens and then you use it to get an incident reading rather than a reflective reading of the light.

Notice the direction of the light hitting the subject.  You move to the same position to get the light reading below.

Point the camera toward the direction of the light that is falling on the subject. 
I have found if the subject is facing me and the light is from the side, I face the camera with the ExpoDisc on it so it is pointing towards the camera position.  The chart above is to help you understand the concept, but you can modify it.

One way you can modify it is as long as the light is the same where you are standing, then you could cheat and take a reading from where you are.  The problem that can arise is if they are lit by Window light and the camera position is in the shade then your color balance will be off if you do not take it from the subject's perspective.
You can use a White Card and get the reading off of this to set your camera. Since every camera has a different process I recommend reading your camera manual for how to set the White Balance.

Better than the white card is a 18% Grey Card. Many of the camera stores sell this as a cloth to clean your lenses as well.

Nikon P7000 shot with -1 fill flash

Step Four: Use Flash

Many times outside you have people with poor light on their face. One of the best examples of this is baseball caps. The easiest way to fix this is to use fill flash.

Refer to your camera's manual on how to adjust the power of your flash. I recommend starting about -1 stops under with the flash. You need to experiment with this to get the results you like. Remember for the most part most pop up flashes on cameras are only good up to about 10 feet outside.

If you use the flash where you have done a custom white balance you could do another one with the flash or just use the flash preset white balance which often is a lightning bolt icon.

Flash with high ISO

I have discovered a couple of things about using flash with a high ISO.
  1. With TTL flash and high ISO I can easily balance these so I can shoot with my 85mm f/1.4 for example.
  2. When you use flash and it is illuminating most of the scene the dynamic range of the photo is compressed. What this means is most of the time the f-stop range of exposure from the highlight to the shadow is more compressed and therefore the noise is the shadows is much less than when shot without the flash.
Nikon D3 - ISO 200 - f/1.4 - 1/160 and Nikkor 85mm f/1.4. Also off camera flash using the Nikon SU800 to trigger the Nikon SB900 flash in TTL mode. The flash is set for -1 stop compensation. In addition I also was using the Radio Popper system to be sure the signal was consistently getting from the SU800 to the SB900.
Once I discovered the affects flash has on shadow, I started to shoot with it in situations where noise was a real possibility and I wanted to diminish the affect of it. I will often shoot with the flash -1 to -3 stops under on the flash compensation setting.
Nikon D3S - ISO 6400 - f/4.8 - 1/100 and Nikon 28-300mm. Also off camera flash using the Nikon SU800 to trigger the Nikon SB900 flash in TTL mode. The flash is set for -1 stop compensation. In addition I also was using the Radio Popper system to be sure the signal was consistently getting from the SU800 to the SB900.
Nikon D3S - ISO 6400 - f/5.6 - 1/100 and Nikon 28-300mm. Also off camera flash using the Nikon SU800 to trigger the Nikon SB900 flash in TTL mode. The flash is set for -1 stop compensation. In addition I also was using the Radio Popper system to be sure the signal was consistently getting from the SU800 to the SB900.


Step Five: Starting Shutter Speeds

Sports

One of the settings I change in the AUTO ISO is the minimum shutter speed. When I am shooting sports I prefer shutter speeds of 1/2000. So I will set this and then shoot in Aperture mode.
The camera will override the shutter speed of 1/2000 and go lower if the ISO gets maxed out at ISO 12,800. If you prefer not to shoot at such a high ISO then you can choose something lower like ISO 5,000 and then shutter speed would drop from 1/2000 much sooner than it would for me.

Flourescent and Sodium Vapor

When shooting under Florescent and Sodium Vapor I normally set the minimum shutter speed to 1/100. You see both of these type of lights are really like flashes.  They are flashing about 60 times a second and if you shoot faster than 1/100 you will get color shifts due to catching the light in between cycles.
Nikon D3 - ISO 6400 - f/2.8 - 1/100 and Sigma 120-300mm f/2.8


Tips for the official photographer of an event

We went out to roam the campus shooting different situations and even did one where 500 people were in a gym listening to the speaker.

Most everyone of the photographers I had to go and talk to them about going up front and taking pictures not just of the speaker, but the audience listening.


If you stay in the back you end of with the back of the heads of the audience and the speaker is all you can see of their face.

If you are the "official photographer" then people expect you to be moving around. If you are there as a participant this can be distracting and make people wonder what you are doing.


I shot photos as well to show the camp photographers how to go to the front of the room and what to photograph.

We also talked about once the meeting is over or not yet started are the best photos. People hanging out and just enjoying each other.

More tips on photos to take to tell the story are here on my earlier blog Variety is the spice of life.

Tuesday, May 21, 2013

How much should I charge?


It is quite common for a professional photographer to get a call asking to use a photo and the photographer doesn't know how to give a quote for the usage.

Understanding Copyright

First let me start with understanding of copyright. It is safe to say that unless you have permission from a photographer to use a photo you cannot use it without opening yourself up to copyright infringement.

If a photo qualifies in Public Domain then you can use it.  Accurate photographs of two-dimensional visual artworks lack expressive content and are automatically in the public domain once the painting's copyright has expired (which it has in the US if it was published before 1923).

There is also the category of Creative Commons License. Here the photographer has given permission for use of their images for non-commercial use. What is considered "non-commercial" is debated. To be sure you are OK clarifying before using would be a good idea.

If you are searching Flickr just look on the side navigation with all the tag and group information, it’s listed in that area with a link to what kind of license it is.

The other category is called Fair Use which can allow for use of images without compensation. My interpretation and I am not a lawyer, but if you are a student and working on a project for a class you can use images. However, if that student publishes those say on the internet could be a violation of copyright. When teachers start using the material it becomes a problem once they publish and distribute the material. Showing a news clip for a class to discuss would most likely fall under Fair Use.

When in doubt get the photographer's permission.

The Phone Call

I have gotten numerous phone calls from colleagues on quoting on some of the strangest uses. My first place to look for starting is the software FotoQuote. It sells for $149.99 and most everyone I know that buys it usually recovers their money in the first few times they use it.

FotoQuote has over 300 stock photo pricing categories and a wealth of coach information.


Often clients are asking for a variety of uses and FotoQuote lets you even create "Quote Packs." This is where you might include all advertising uses and exclude editorial. Just remember there are over 300 categories alone in this software package of categories.

Besides what category you are also giving permission for how big the image will be used. For example is it the main part of an ad or just a spec? Will they use your photo for the cover or just a thumbnail head shot with an article?

How often they use the image makes a difference as well. If they are publishing only 300 brochures for a meeting verses a print run of 5 million should be priced differently.

How long they get to use the image is also another variable. Will they use the photo one time, one month, one year, multiple years or unlimited should impact your price.

The first few times I was quoting on large projects I could feel the sweat on my forehead and my heart racing. I was having a panic attack.

Guidelines for quoting

Here are my tips for quoting on a usage. We need to first start with your base. If this is an assignment the basic price should be about the same for similar assignment, the differences in price are for the use. So, an executive portrait for a print on the wall in the companies headquarters verses it being use on billboards and running on the cover of Forbes Magazine will change the price, due to usage.
  1. Always ask what their budget is for the project up front. Sometimes they will give you a better deal than you would have asked.
  2. Be prepared to negotiate. Your first quote will often be countered. Therefore it is better to quote a little higher and have room to drop your price.
  3. Whenever you change your price you should change the usage terms.
  4. To speed the process along, I recommend going to a client with three prices. Your rock bottom price, middle range price and the high end price. This makes them see you as already trying to work with their budget. 
 Creative Fee and Usage Fee

When quoting on an assignment separating the creative fee and usage fee is a good idea. In addition to the creative fee you might have expenses as well listed.

I would suggest trying your best to encourage the client pay for as much usage up front. To help encourage them it would be great to list usage fees for future purchases.  I would probably state the time these prices will still be good as well.

For example you might allow them for an unlimited usage right now for $10,000. If they come back to you later that price should be much higher.  By putting this in writing and up front with the client you are showing them you are being transparent and trying to work with them.

Magazines

One category in the FotoQuote database I find helpful is the going rates that are known for different publications. Many of the magazines listed will even let you know the rights and there going rates.  Basically they set the price and you decide to except their terms or not. Sometimes you might be able to get a better rate if you have a specialty or the only one with access to the subject.


I think of using FotoQuote like a pilot does when they are flying in the clouds, they are using the instrument panel to help guide them.

Remember FotoQuote is a guide and not prices fixed by the industry. These give you some starting points to help you negotiate.

Just as important as FotoQuote are other photographers. This is why I joined American Society of Media Photographers [ASMP]. I can pick up the phone and ask other members their advice. Often some of them have more experience than I. I am not calling for prices as much as also how to communicate with clients. Often how you word something can make a huge difference.


Monday, May 20, 2013

Photographer have you ever lost a password? Here is a software solution for you.


Years ago we could use the same username and password for just about everything. The upside to doing this is you only had to remember one login.

With identity theft on the rise and corporate espionage being a real threat you can no longer do this with your login accounts.

Today I have three different places I am logging into my accounts: 1) my Macbook Pro, 2) iPad and my 3) SmartPhone.  Trying to remember all those logins was getting ridiculous.

Over a year ago, I Googled looking for a solution. After reading reviews I tried a new software call 1Password.  After using this for a year I feel good about recommending it to you.

The good news is it is cross platform. If you have a PC, Mac, Android, iPhone or iPad. 1Password can remember all your passwords for you and keep them secured behind your Master Password. You remember your Master Password and 1Password will remember the rest.

I have been using this now for over a year and feel good about recommending it to you.  It has really simplified my life with having to remember passwords, account information and more details than I can remember.

1Password Categories for saving information:
  1. Logins [web]
  2. Accounts [email, web hosting]
  3. Identities [personal information]
  4. Secure Notes [Anything you want to save as text]
  5. Software
  6. Wallet [credit cards, bank account #s, debit cards]
You can put all your credit cards into the system and when shopping online it will fill out those long forms for you most of the time.

After you install it on your device you are able to also embed the program into your browsers. Anytime you go to those secure websites where you need to sign in all you do is sign in once to 1Password and then click on the pull down menu where it will then fill out the login information for you.


Sometimes your computer can crash and with 1Password you now can have all your software license keys in one place to restore your software.

You can sync over a Wi-Fi connection or using Drop Box.

Need to generate a new password? I have certain places I go that every 90 days I must change my password. This is the main reason I was forced to come up with a better plan than I had been using. The cool thing is the software creates a gibberish password using capital letters, numbers and symbols for you and therefore making your password more secure than using your pet's name for example.

Sunday, May 19, 2013

Photographers are your clients smarter after they hired you? They should be!


“Make your boss smarter than before he or she met you. Bring new insights to the place. Then, you become indispensable.” – Jack Welch

The Power of Insight

An insight is the power of acute observation and deduction, penetration, discernment, perception called intellection. It is an understanding of cause and effect based on identification of relationships and behaviors within a model, context, or scenario.

I really enjoy covering meetings for one reason—I get to listen and pickup insights from great leaders of our time.

I realize that many of the thoughts I have are like a bunch of strings just entangled with one another looking like knots. Often an insight or eureka moment is like the untangling of the string of knots and putting them onto a spool making them now ready to be woven into a tapestry of art.

Most of the time these moments are simplifying what appears to be complex. I am often thinking after these moments how beautiful this insight is to life.

Jack Welch, the former CEO of General Electric, took the company from 13 billion a year company to a $400 billion and in 2000 was named “Manager of the Century” by Fortune magazine.

Mr Welch was one of the speakers at Chick-fil-A Leadercast and mainly was talking about how good leaders have a ‘generosity gene.’ They know when those who work for them is nourished they flourish and so too does the company.

While I am not running a $400 billion dollar company, I do believe good business practices are universal.  

The nugget I took away was this statement made by him:
“Make your boss smarter than before he or she met you. Bring new insights to the place. Then, you become indispensable.”
Now if I just make great photos and give these to my clients will this make them smarter? I don’t think so. To help make them smarter I will have to develop a relationship where I have the time to explain why certain images I believe are the best to use.


One way to do this is to provide two folders of images to your clients. You provide one folder that has all the images in them and another folder with the selects. My suggestion is you then take time to briefly state why you think these photos would be best to use.

I find myself often saying here is this photo, which is graphically very strong and captures a cool perspective of the event for you. With another photo I am talking about how this photo works best for the highlight of the coverage. It would be like picking the play of the game from all the sports photos of a game.

Often I am picking photos and explaining how the body language of a particular photo shows emotional connection that is the strongest of the collection of images.

The “eureka moment” for me was to remember to always help make my clients smarter. This means more than just dropping off photos for them.

Your client will not have time to go through all the images with you to have you walk them through your selections. Just be sure to summarize how the photo helped them further their cause and the reason they hired you to shoot something for them.